
TECHNOLOGYX TEST BENCH
Our build today went fairly smooth with no major hiccups and the Masterbox 5 was easy to build with.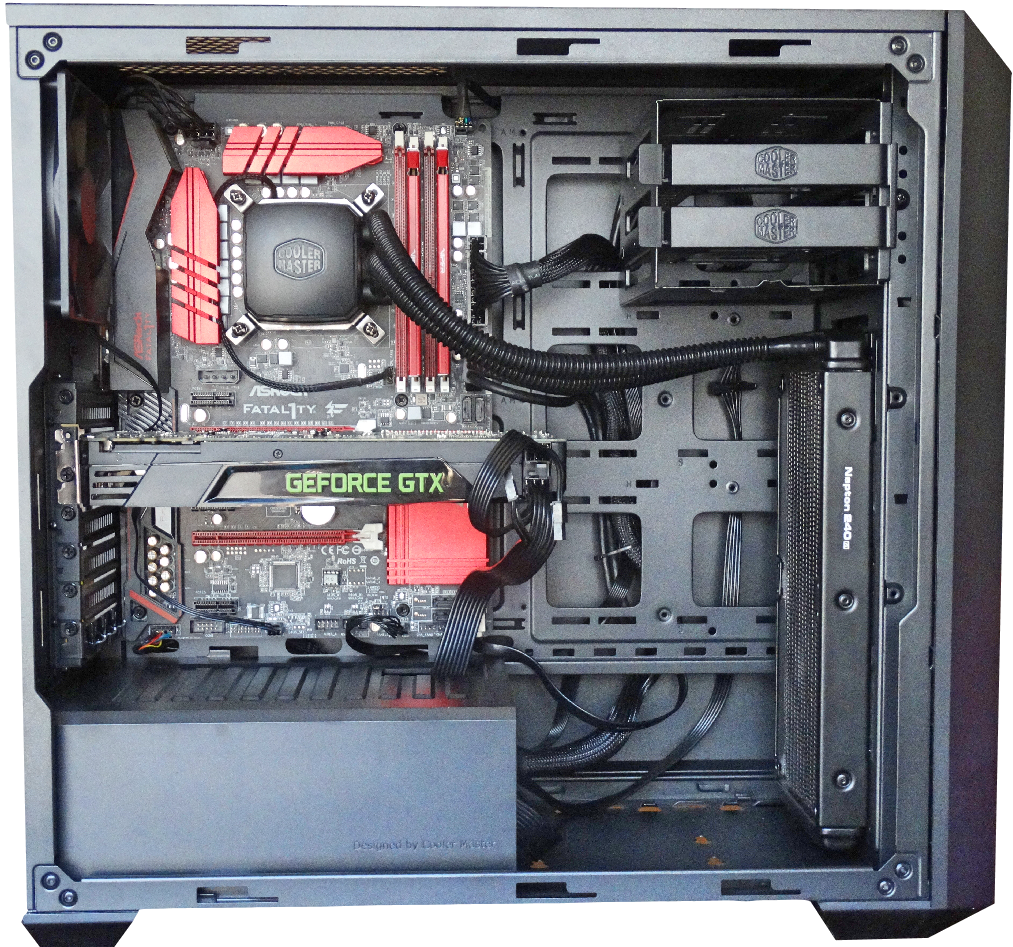 If you like today’s build and wish to replicate it, feel free to check out our links to amazon by clicking any of the components below!
| Motherboard | ASRock E3V5 Gaming/OC ATX |
| CPU | Core i5-6600k |
| RAM | Patriot Viper Extreme Performance DDR4 |
| Cooling | Cooler Master Nepton 240M |
| VGA | Geforce GTX 680 4Gb Enthusiast Edition |
| PSU | Cooler Master V1000 |
| SSD | Pny Xlr8 Pro 240Gb |
BUILD
As mentioned earlier our build today went fairly smooth. A few notable mentions of course but overall a pleasurable experience. We will break it down by component for ease of learning in the order of our installation:
Motherboard (inc. CPU & Ram) – The motherboard installation was easy just make sure you install all the proper stand offs before laying your board in place.
PSU – Remove the PSU cover using the thumbscrew at the back and installation will be a breeze, we recommend leaving the PSU cover off under you are done all your cable routing and installations. This is just to keep the most space open for your hands in your chassis.
VGA – No issues with the VGA although Cooler Master has switched from thumb screws to plain screws which makes installation a little more tool oriented. Keep in mind your VGA length will be limited if you choose to use the 3.5″ bay in certain positions as well as a front mounted radiator.
Cooling- Choosing the Nepton 240M limited our options of placement to the only available, the front. In doing so we had to remove the 3.5″ bay, we had the option to move it over and it would have fit but we didn’t want to restrict the airflow. If we had used the fan bracket we could have mounted it above the drive bays creating a better direct path airflow but we wanted to play around with the modular abilities of the case. As you can see the set up fit quite nicely. Remember you always have the option to go with a 120mm radiator on the back panel to keep the front panel to fans only. Housing both 120mm and 140mm fans at the front.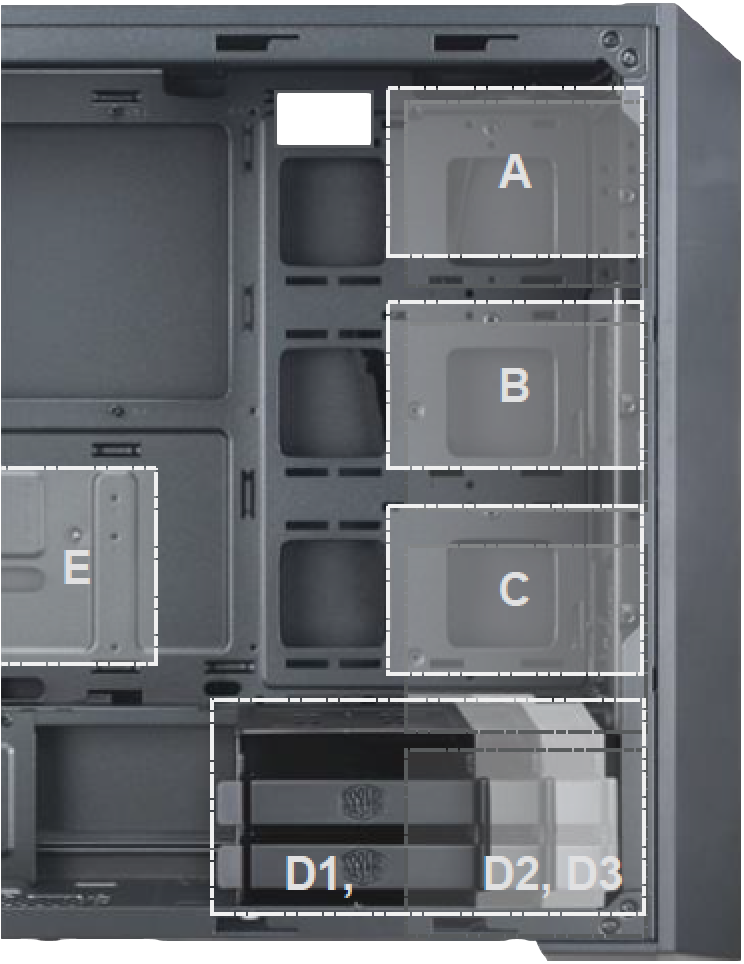 3.5″ Bays – As mentioned we removed the 5.25″ drive bays and substituted it with the 3.5″ bays. this made for easy access to SSD and allows room for a second There are two screws at the rear that go in from the back but there is no included bracket to secure the bay to the front panel even though there are screw slots available. Keep in mind if you do upgrade and purchase the fan bracket to go up to a 360mm cooler you will have to put the 3.5″ drives on the floor level left of your radiator. This drive fits in all spots except E.
2.5″ SSD – This Single storage SSD fits in A,B,C, on top of the 3.5″ drive bay (D) or E. As soon as you choose to use a liquid cooling system on the front panel the SSD position is limited to E or on top of the 3.5″ drive on the floor setting.
CABLE MANAGEMENT
This part of the build was a dream. We had not one issue with cable management and are happy as could be. The only improvement we would recommend for this is to add rubber grommets to the pass-throughs to add a little more cleanliness and not being able to see everything on the backside. 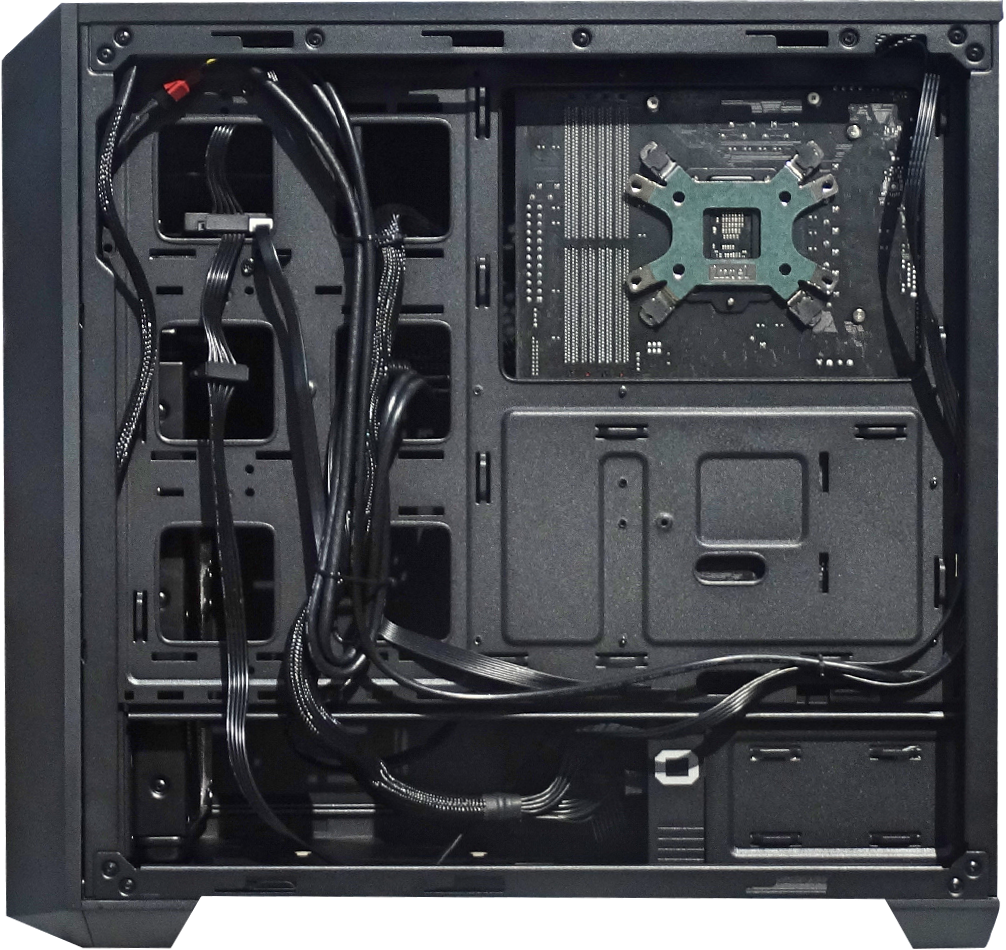 An abundance off tie-downs makes it easy as well as the lipped edges keep your cables in place.
Review Overview
Chassis & Contents
Specifications
Build
Price
Warranty & Availability
Customize!
MasterBox 5 is a great case to build with, the pro's out weight the cons on this one and comes recommended from your friends here at TechX!
Nice review, thanks. I have a question… that vertical PCI slot at the back, it looks like it can be punched out. Could you have a GPU mounted vertically inside to take advantage of that??
I don’t see why you couldn’t the slot is there just the ability to mount it would be a little tricky, also it’s a single height slot which limits what you could do there. This isn’t a windowed version of the case either so the side mount would only be useful if you purchase the window panel separately.
I’m a little confused; the title says that this is the Canada Edition of the case, what makes it Canadian – I don’t see any maple leaves scattered about (lol).
Yes, we were a little concerned about the lack of maple leafs as well! I talked to the company and they said the only difference between the US and CDN version is that the CDN version doesn’t have the window side panel and the US version will be available in White. Basically they are just limiting what we will have retailed here. Not a huge fan of that kind of limitation and for the future when they try and make something sound special by branding it “Canadian Version” maybe have something Canadian specific about it rather then just limiting what is available for us.