
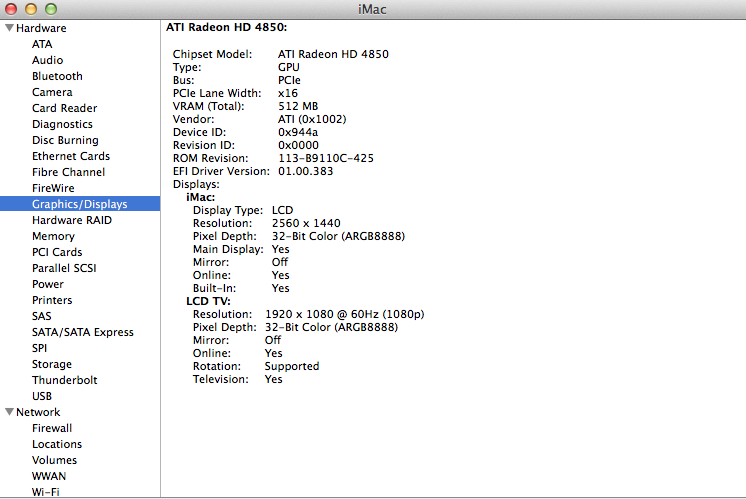
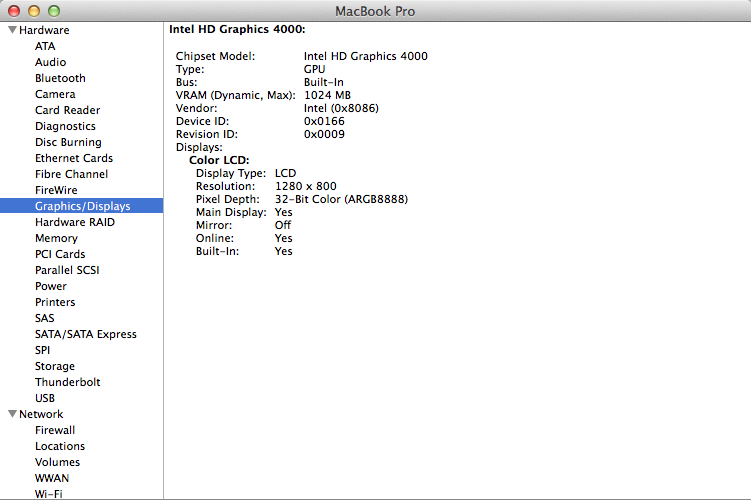
HOW ABOUT MAC GRAPHICS?
You’re right, we have spent all this time referring to Windows products, making generalizations regarding PC’s and optimizations for a PC, but what about those who prefer computers manufactured by fruit? First things first, find out what type of GPU you are running off of: is it a dedicated graphics card, or is it built-in (integrated) graphics. Click on that shiny Apple logo found at the top left of your screen and click on “About This Mac”. Go a couple of steps further and select “More Info…” and then “System report”. Inside here look on the left navigation tree and select Graphics/Displays. Inside of this informative screen you will see the manufacturer, model and bus type of your graphics card. Below we have two examples, the left is the dedicated graphics card running out of the PCI Express X16 slot. On the right is the integrated graphics found in a MacBook Pro.
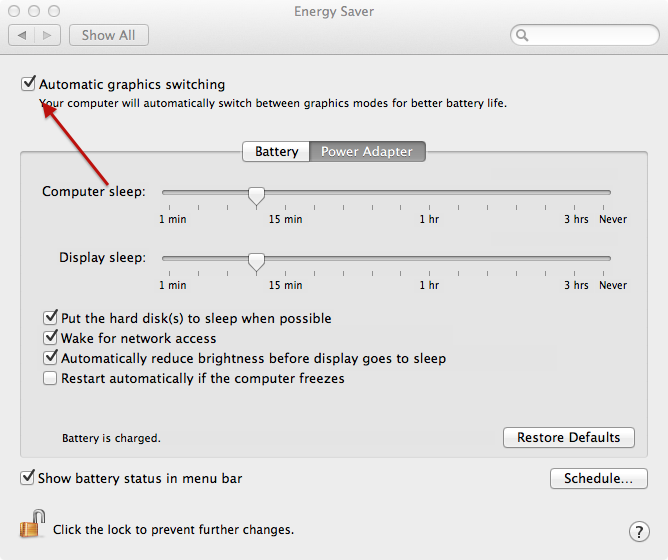
If you have a MacBook Pro that features a dedicated graphics card then the you may be fortunate enough to be able to supercharge your MacBook’s graphics performance with the flip of a switch … really, it’s that easy! On your MacBook Pro, head over into System Preferences, and further into Energy Saver. At the top left you may have the option to disable Automatic Graphics Switching, make sure that is unchecked. Doing so dedicates the individual graphics card to focus primarily on producing your Mac’s graphics, and leaving the CPU to focus on its necessary functions.
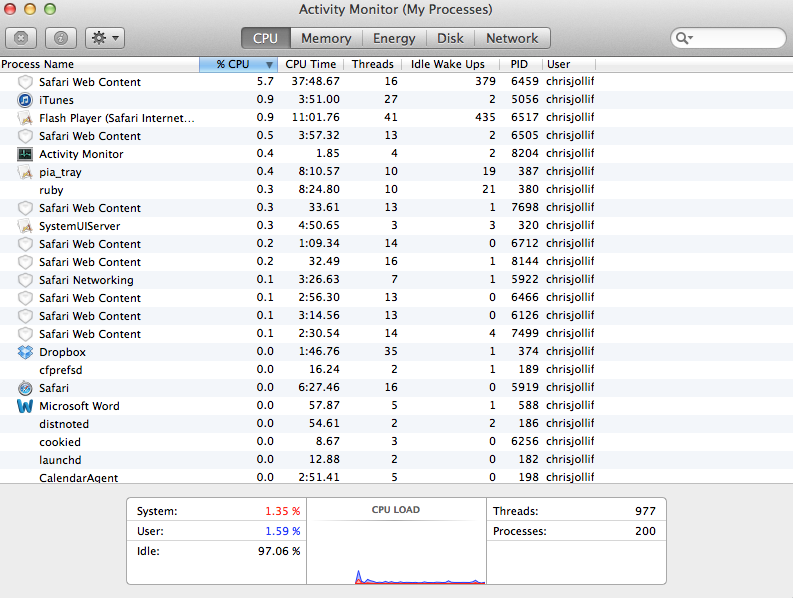
The next step would be to take a look at what programs are currently sucking up your Mac’s processing power. While this tweak is more geared towards overall system performance, graphics performance will also be affected. Head over into Activity Monitor that can be found in the Utilities folder inside Applications. Sort all of the processes that are running to show the higher CPU processing percentage at the top. If you find that these are from applications that are sitting idle in the background, or you haven’t used them for a while, go ahead and close these applications and clear some of that CPU processing space so that you have more room for your games.
When it comes to tweaking the performance on your Mac, it is much more difficult that heading over into Control Panel and adjusting one setting. In fact, majority of the settings you tweak are based within your game itself rather than your operating system. If you are trying to run a game on a Mac and you notice the game to be running a little more rugged than you would like, hop on over into the Video Settings of your game and adjust the settings for optimized performance. The screenshot below gives you a quick example of how easy adjusting these settings may be, but we would need a couple of years to put together a guide for optimizing every game for pristine graphics. Your best is to head over to Google, pop in the name of the game and ask for the optimized graphics settings.
Did you just get all excited for that new game? Watched the trailer and you’ve already got it pre-order? First thing you could do to bump up the graphics in your Mac is swap out that sluggish hard drive for a solid state drive. This is one of the easiest and fastest upgrades you can make to your system, and you’ll be supplied with definite increase in gaming performance.
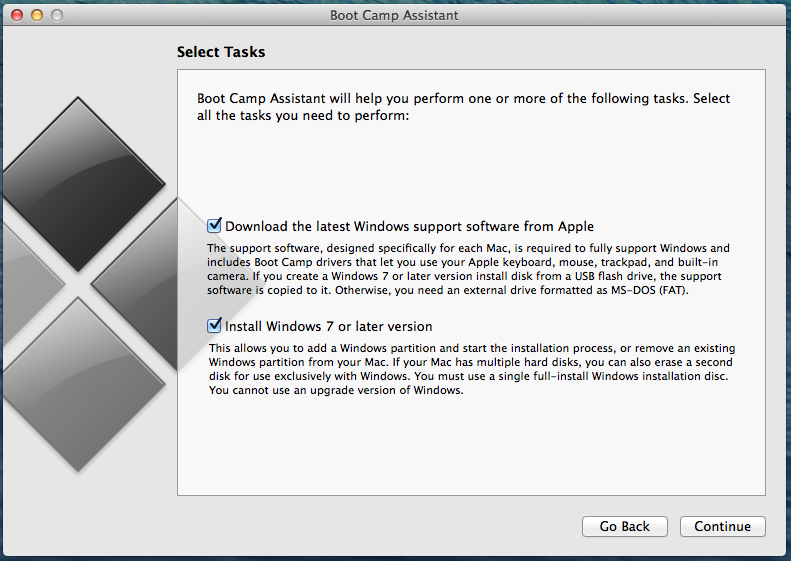
What happens when the game arrives and you find out that it only runs on PC … uh oh! There is another easy option that still lets you play that PC game on a Mac, it’s called Boot Camp Assistant. Simply load up the application that can be found in the Utilities folder of your Applications. Load up your Windows Install Disk (DVD or USB) and follow the on-screen steps. It really is that easy.
The only downfall with having Windows installed on your Mac’s storage device is that it’ll take up a fair amount of disk space, especially once you throw your game files on there as well. Make sure that your solid state drive is of adequate capacity to properly fit both Mac and Windows, and have ample room for further expansion.
Helpful
very helpful
Good article. I used it in one of my college papers
That is perhaps one of the best compliments to this site; thank you.
Now I feel like a huge Geek whenever I explain this stuff to my friends… this is awesome.
Will the next gen card be called Radeon R9 490?
We wouldn’t be able to tell you even if we knew, but most likely.
I was just going the fact the previous cards were 290 and 390 I figured the next logical choice was 490. unless Titan is the name of all cards from now on
if other parts of the site are as good as this article then I’ll have to add this site to my Computer technology bookmark folder.
Care to elaborate? We are always looking for suggestions.
– this is something new. Actually, processors have built-in graphics. Besides, why didn’t you mention the AMD A6/8/10 processors, that are not on par with Intels considering their CPU performance, but if we compare the graphics power, this is where Intel is still far behind even with its Intel 4000.
Besides, look for prices: https://hardware.nl/catalogsearch/result/index/?lang=en_US&manufacturer=AMD&q=AMD+A10
So, if you are not going to play video games, then forget about an additional power-hungry stuff. Such AMD processor will handle even some games. Other than this remark, the article is pretty good to me.
Valid point. APU’s are a great option if your budget doesn’t let you go all out and get a dedicated card.
Take a look at our review of the A8 – AMD A10 7870K CPU Review – Welcoming Competition! or even the A10 – AMD A8 7650K APU Review – The Little APU That Could! … Both show that these are excellent graphics options, which don’t require integrated graphics.
Apu’s are the future eventually discrete gpu’s will become obsolete. AMD made a big step in the right direction with the development of the apu and HSA.
best content for noobie
now i feel like a graphics god XD