
DIY WATER COOLING
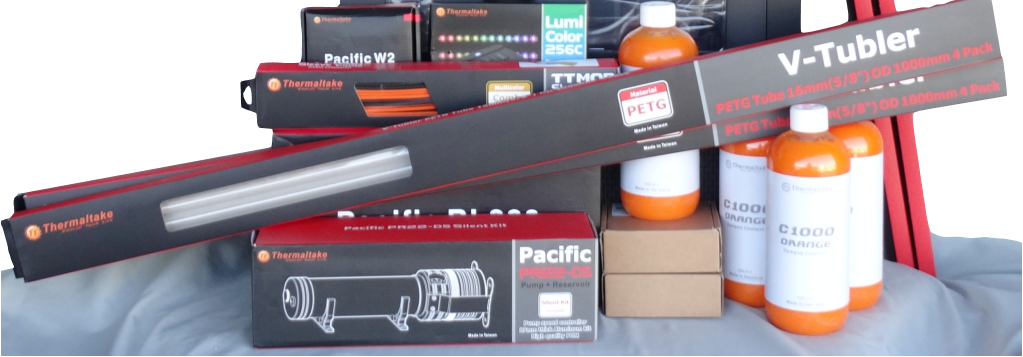
This was probably one of the most fun with the most hiccups we have had in a while, but we at TechX love a good challenge. Along with the X71 Thermaltake also provided us with the following for our build:
Everything listed above is easily found just click the piece and it’ll direct you straight through to amazon! We appreciate any purchases on Amazon through our links!
As mentioned above we did have some hiccups along the way, but it was all for your benefit. How is that you may ask? We did this build cold turkey, no instructional videos, no previous knowledge just our own thought process and a can-do attitude!
STEP 1
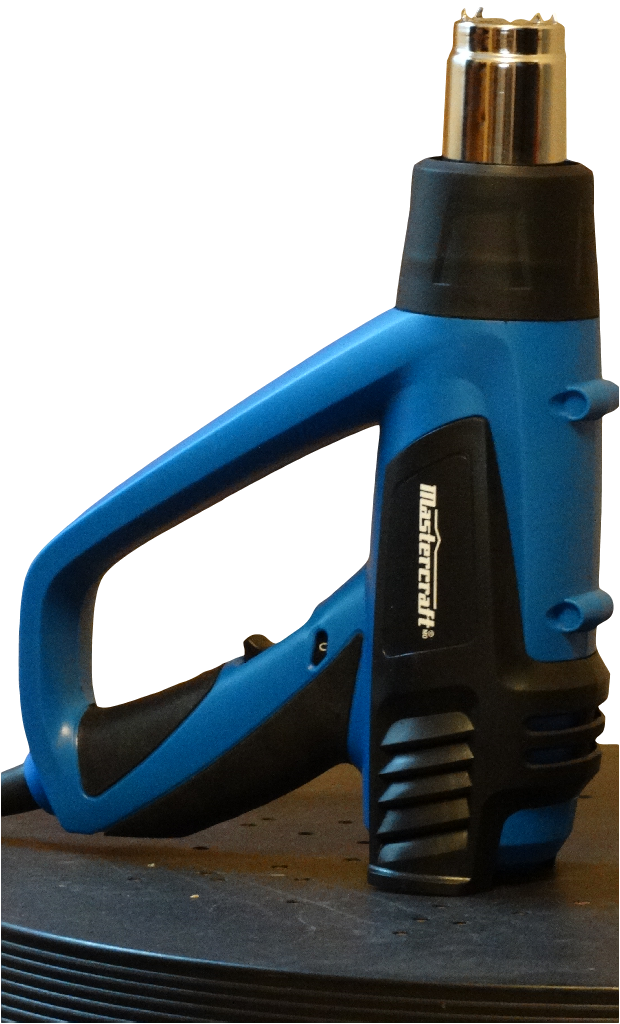
Before we starting installing or messing around with anything we wanted to learn how to bend the tubes. Get a hang of it before we started doing anything around our components. Ensure that if you are going to take the DIY cooling route that you purchase the Pacific Hard Tube Bending Kit as well as a heat gun, preferably with different heat settings and one that has a stand so both your hands are free.
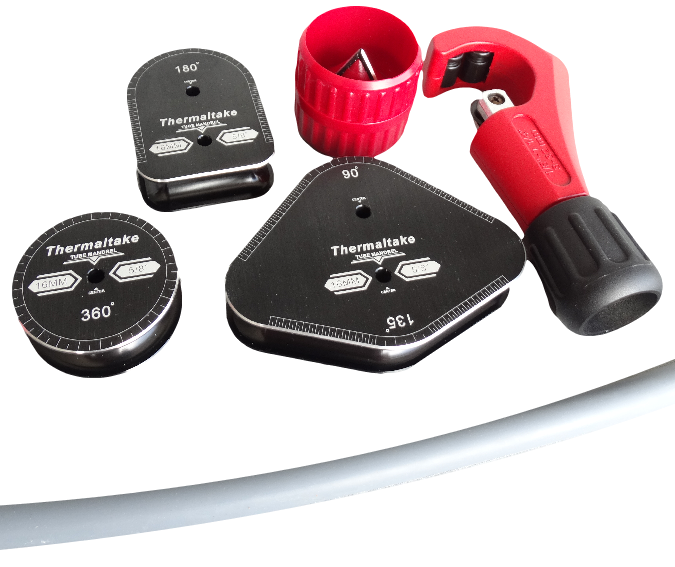
The kit necessary mostly for the 16″ silicone insert which you place in the tube while bending but also for the in and out reamer to rid of any burrs after cutting. We are using the PETG tubes from Thermaltake as mentioned earlier.
![]() The angled mandrels also allow you to have concise sharp angles in your tubing. If you so choose to try and venture into this world of cooling without this kit you’ll end up with kinks, bottlenecks and uneven coolant flow, which comes with many more problems once you hook up to your system. Don’t rush! Take your time heating up your tubes and make sure they are nice and malleable before you start to bend them. Once you are comfortable with bending the tubes and have practiced using the mandrels to get the angles you desire that realization of how easy this is to do comes to light.
The angled mandrels also allow you to have concise sharp angles in your tubing. If you so choose to try and venture into this world of cooling without this kit you’ll end up with kinks, bottlenecks and uneven coolant flow, which comes with many more problems once you hook up to your system. Don’t rush! Take your time heating up your tubes and make sure they are nice and malleable before you start to bend them. Once you are comfortable with bending the tubes and have practiced using the mandrels to get the angles you desire that realization of how easy this is to do comes to light.
STEP 2
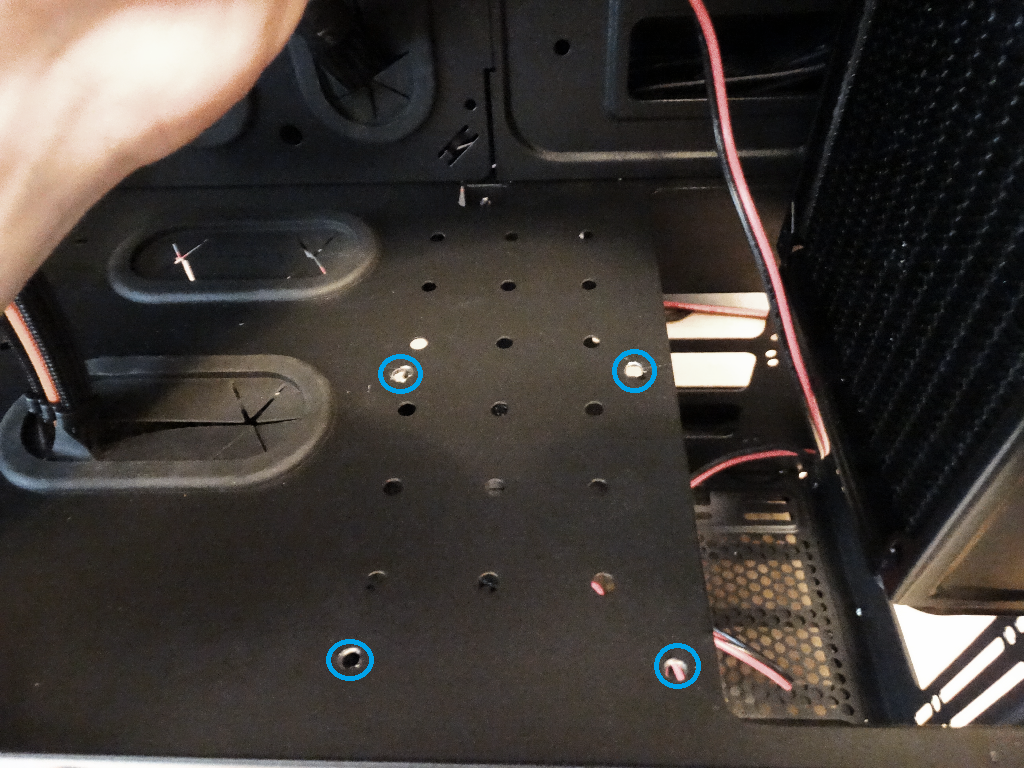
Now that we have the feel of tube bending it’s time to look back at your case. The biggest thing you need to fit is the Pump + Reservoir, we went with the Pacific PR22-D5 Pump + Resorvoir Silent Kit as it’s a combo of both and saved us a little space. Unfortunately with the X71 case there was no spot where the holes of the case and the holes for the pump stand met up on all four spots. We drilled our own holes to ensure security as well as the aesthetics we desired.
 This struck us as odd as we’ve seen so many builds with pump/reservoirs in the X71 but until you go to install your own it never really occurs to you if there is a pre-plotted spot for it. We also decided to keep the radiator mounted in the upper compartment for two reasons; it keeps those beautiful Riing 140’s glowing out the front panel as well as it would be much more difficult to route the tubing. We also set the Pacific W2 CPU cooler in place with a piece of tissue paper between it and the CPU. We did this because we didnt’ want to have the two surfaces rubbing dry against one another and also didn’t want to waste any of the thermal paste as this was just a fitting stage and we weren’t going to be turning on the unit. If you choose to do it this way DO NOT turn on your system until you have removed the paper, for obvious reasons.
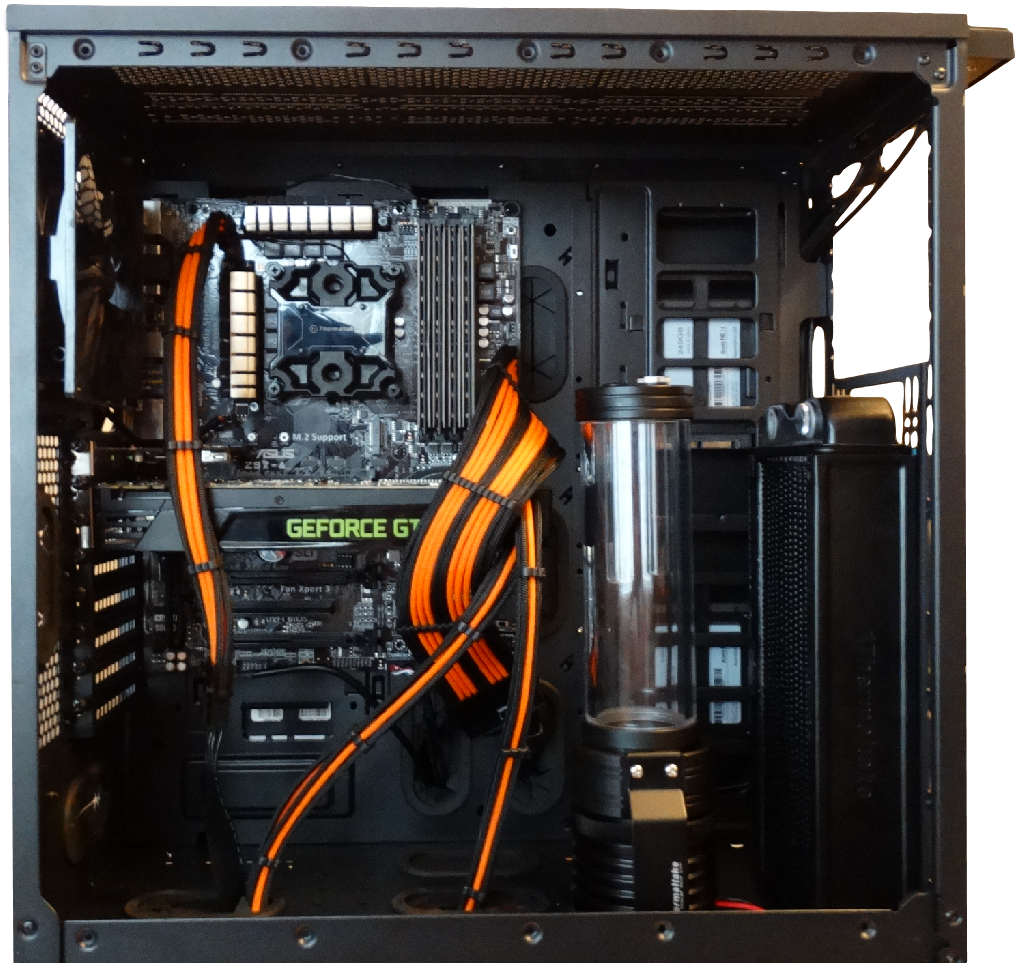
Above you’ll see our completed layout ready for tubes. One precautionary measure we took with the radiator is filling it with water and shaking it up and draining it a few times. This ensures to clean it out the best you can and get out any smalls burrs out.
STEP 3
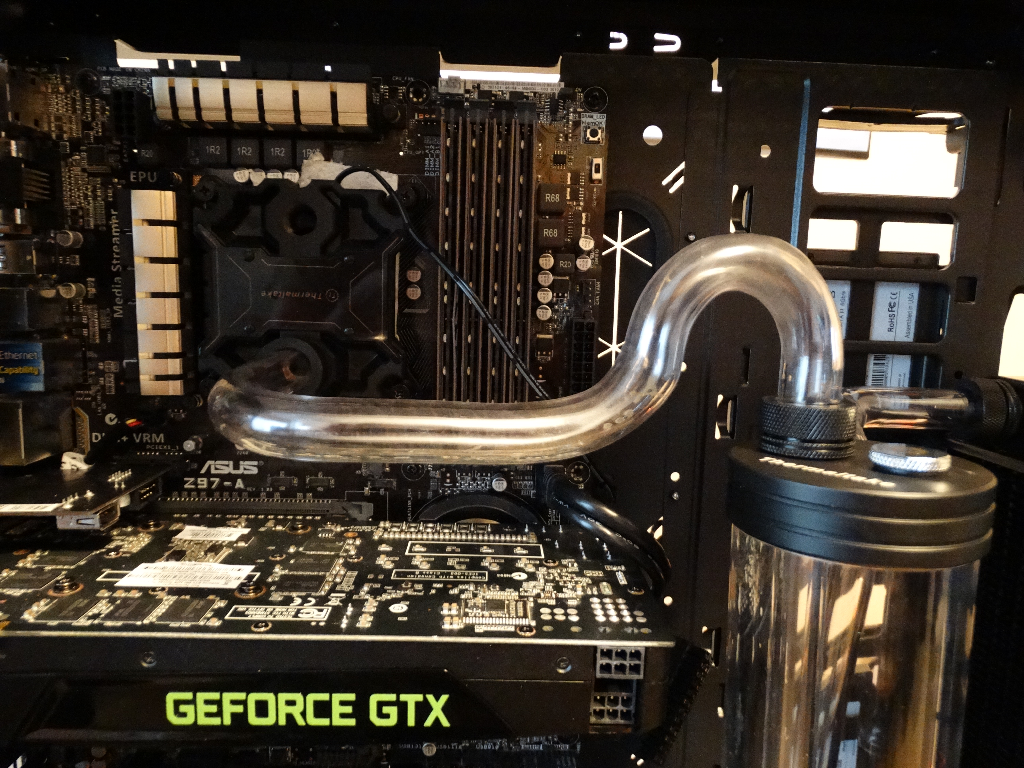
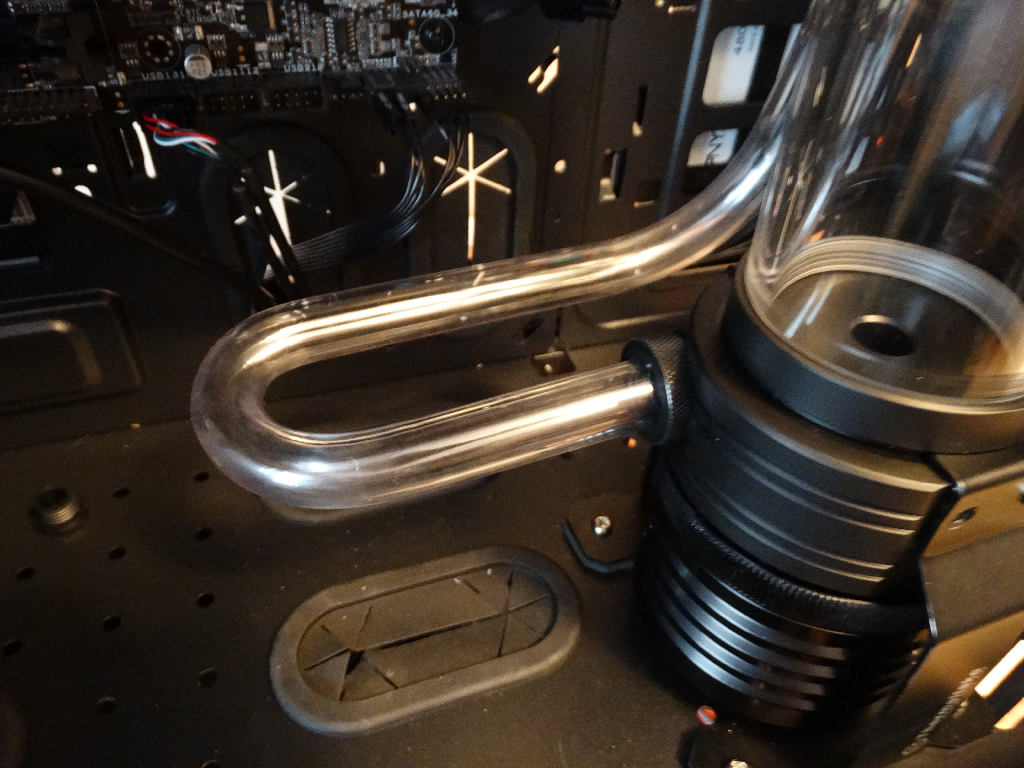
Before you start bending your tubes to finalize your build get an idea in your head of how you want things to flow. Visualizing the placement of the tubes will go along way when you start setting up. Our set up starts at the pump/reservoir, into the radiator, into the W2 CPU cooler then back to the reservoir. The way we made our tubes was we measured the distance we wanted a tube to travel until you make an angle then we added a few cm’s as a buffer because we can always trim the length with the tube cutter. As you will see from the photo’s below the tube bending was very easy and to route the tubes took us a total of 45 minutes. Now, we took extra precaution as we didn’t want to mess anything up but we were happy with the result and extremely happy with the ease of use and time efficiency we had.
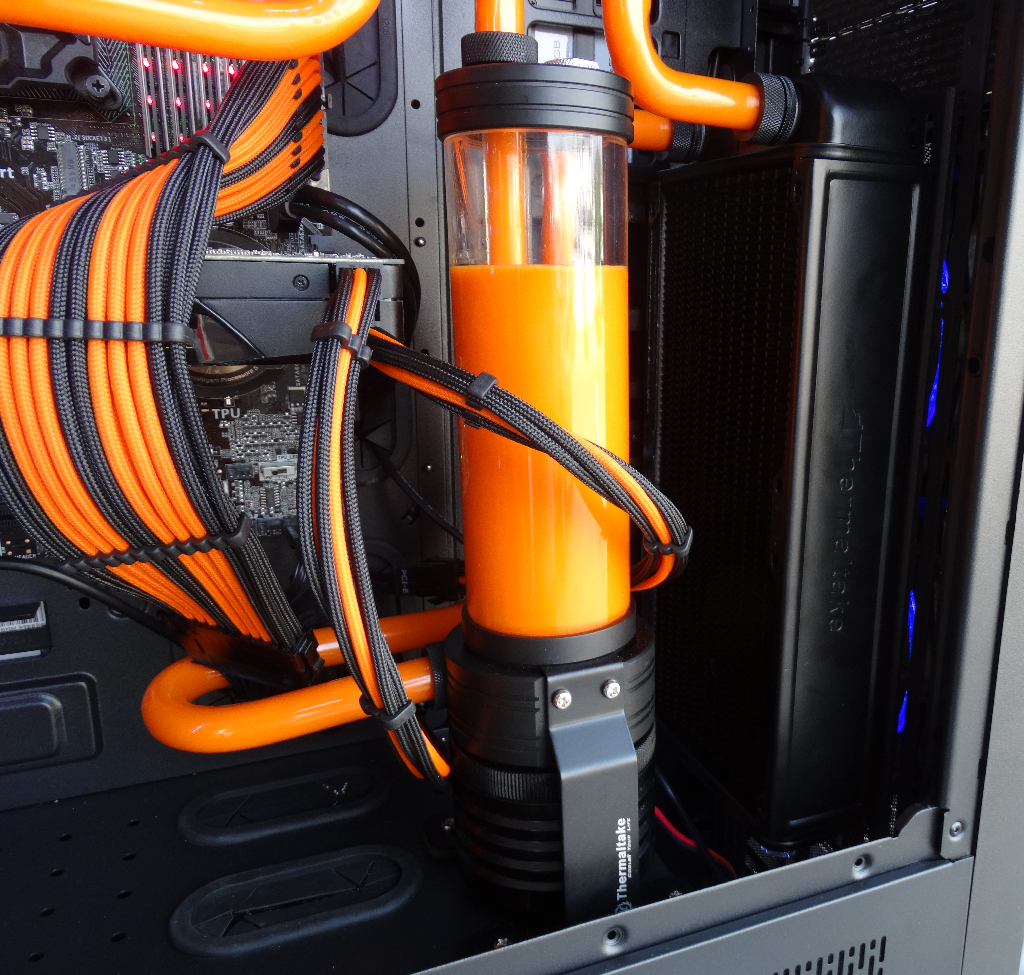
With all tubes in place and ready to go you may think you’re ready to go, not quite yet. To ensure all your parts work properly and all seals are tight you’re going to want to strip out all the parts and run your loop away from your components. Once you’ve done that you’re ready to reinstall and get going.
Review Overview
Core X71 Chassis Features
Core X71 Price
Pacific Loop Cooling system Installation
Pacific Loop Cooling system Price
Lumi Color LED Controller Kit
Lumi Color LED Controller Kit Price
Success!
The combo of the X71, Lumi Colour LED controller & pacific hard tube cooling kit is sure to please any enthusiast's aesthetics as well as offer optimum performance!