
INTERNAL TOUR
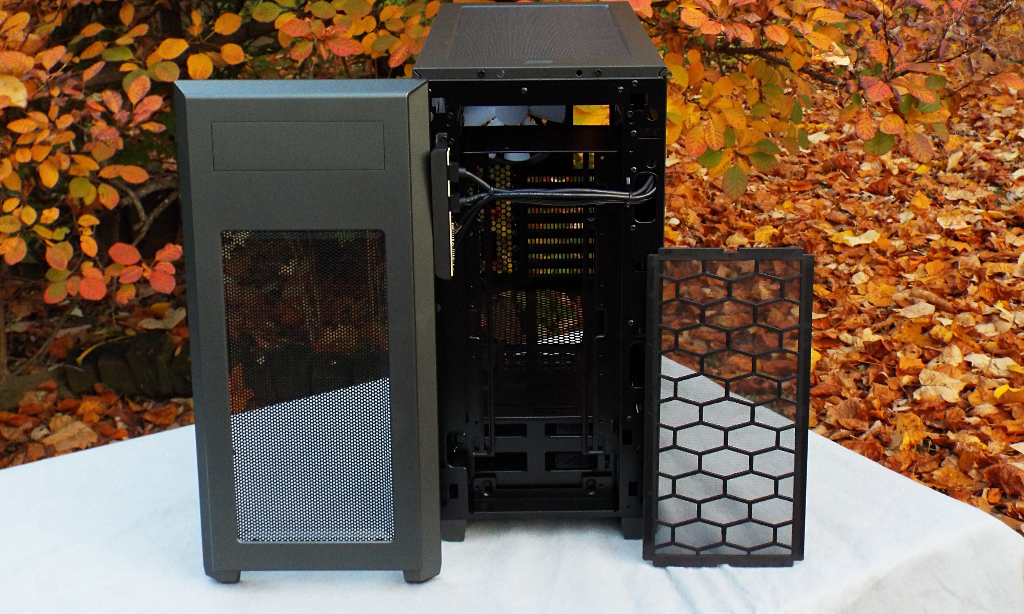
Now let’s take a tour around the interior of the Enthoo Pro M. Starting at the front, the front panel pops off (requires a bit of a tug on the bottom edge to loosen). Looking at the back side of the front cover reveals the front fan filter, which can be flexed out from behind the two plastic retaining tabs in order to clean it. You can mount up to 2 x 120mm or 2 x 140mm fans, or up to a 240/280mm radiator in this area. By removing the upper optical drive bay, this increases to be able to mount up to 3 x 120mm, 3 x 140mm, or up to a 360mm radiator. You can also see that the wiring for the front panel connections and reset switch span across this area.
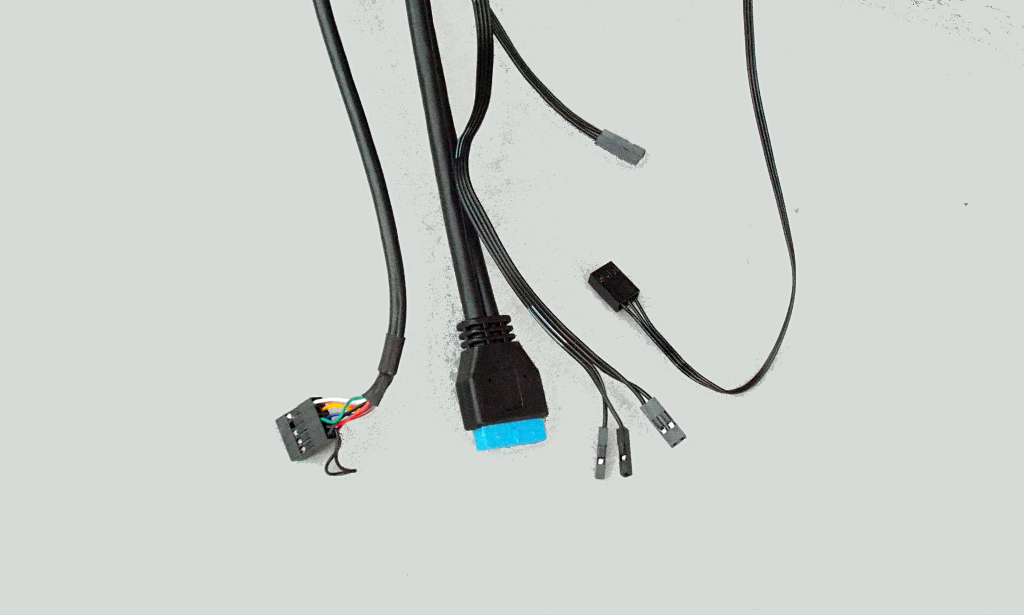
Below we see the typical front panel motherboard connectors.
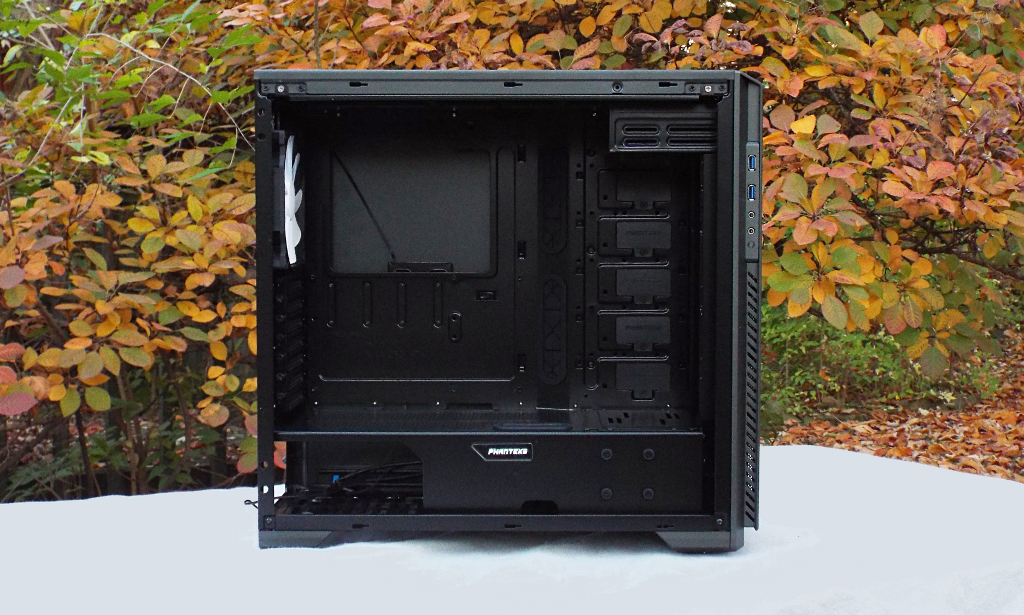
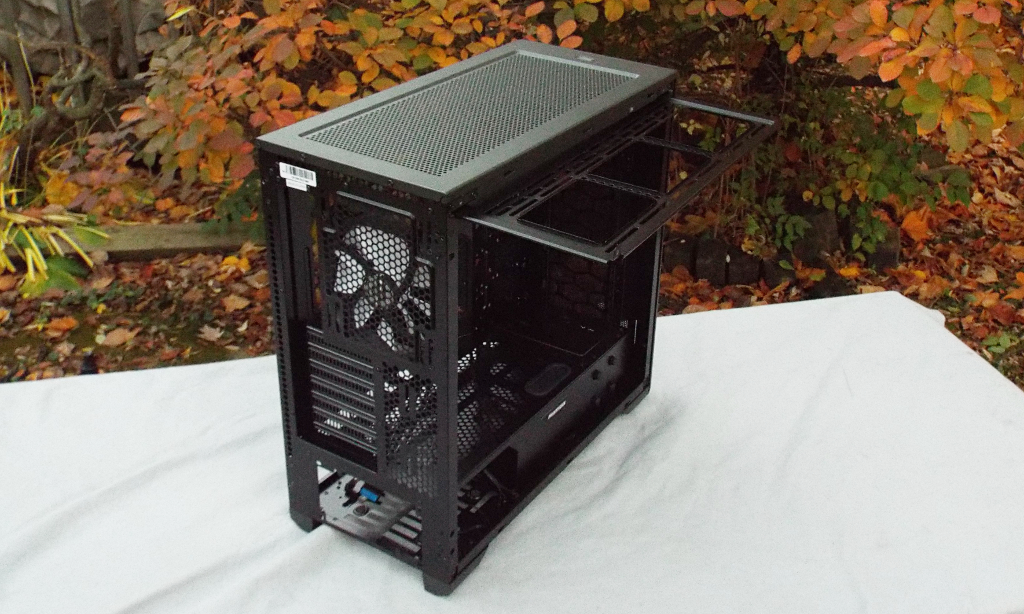
 Removing the left side window panel reveals two separate chambers. The lower chamber is for the power supply, and also houses the lower drive cage with two trays for 3.5″ or 2.5″ drives (this must be accessed by removing the right side panel). One can also mount a 2.5″ SSD to the front lower vertical panel towards the front of the chassis. The motherboard tray sports an amply large opening for installing an aftermarket CPU cooler. The two large openings at the right-hand edge of the mortherboard tray for cable management have substantial grommets present to protect wiring from damage.
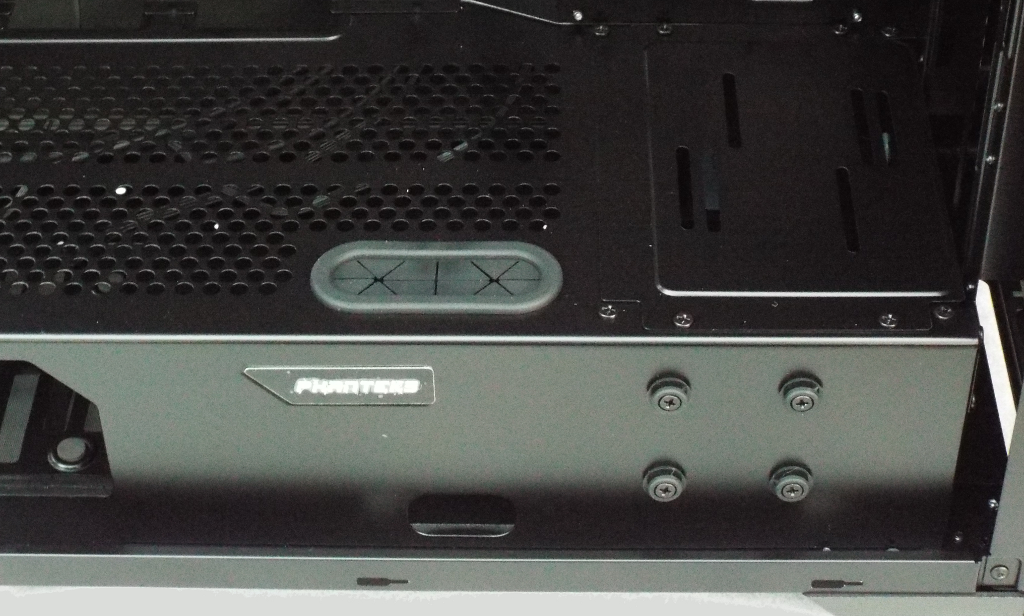
As we stated in the introduction, the top horizontal panel of the power supply chamber is perforated for enhanced airflow, and also sports a grommet-protected cable management opening that is ideally situated for feeding a power cable(s) to your graphics card(s). Also visible to the bottom right is the front SSD mount.
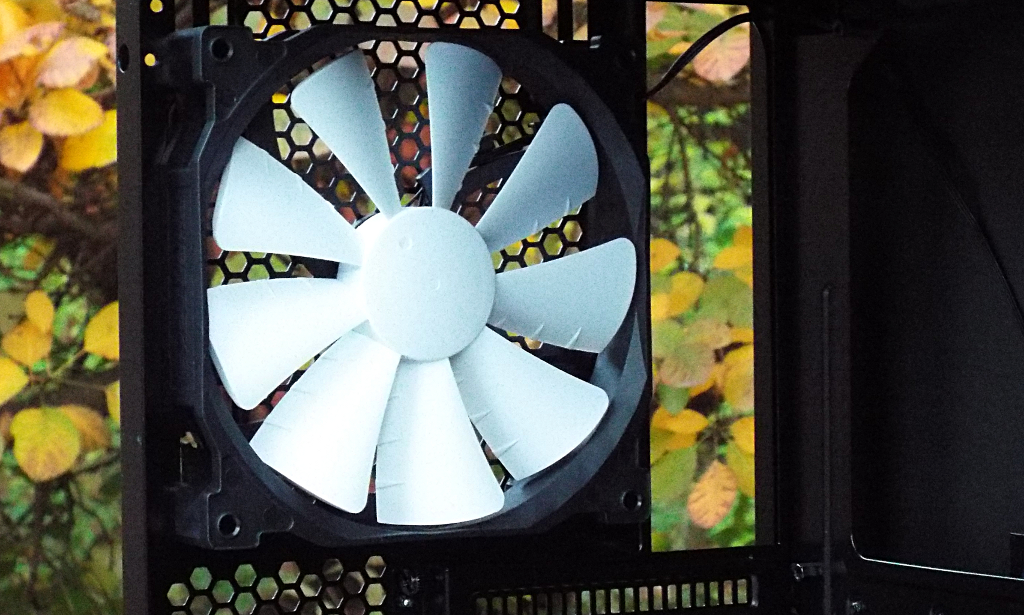
Here we see the 140mm pre-installed rear fan, which can be replaced with either a 120mm or 140mm radiator. The included fan is Phanteks’ latest premium PH-F140SP model, which has a speed range of 950-1450 RPM.
Probably the most unique feature of the Enthoo Pro M is a removable top fan/radiator mounting bracket. By removing two screws along the top edge of the chassis, and three more screws on the back of the motherboard tray, the bracket slides completely out. This allows for mounting fans and/or a radiator with added ease by not having to work within the confines of the chassis, and then slide the completed assembly back into place and re-securing the mounting screws (more on this when we get to actually assembling a system into the Enthoo Pro M). Below we see the fan/radiator bracket slid out but not removed.
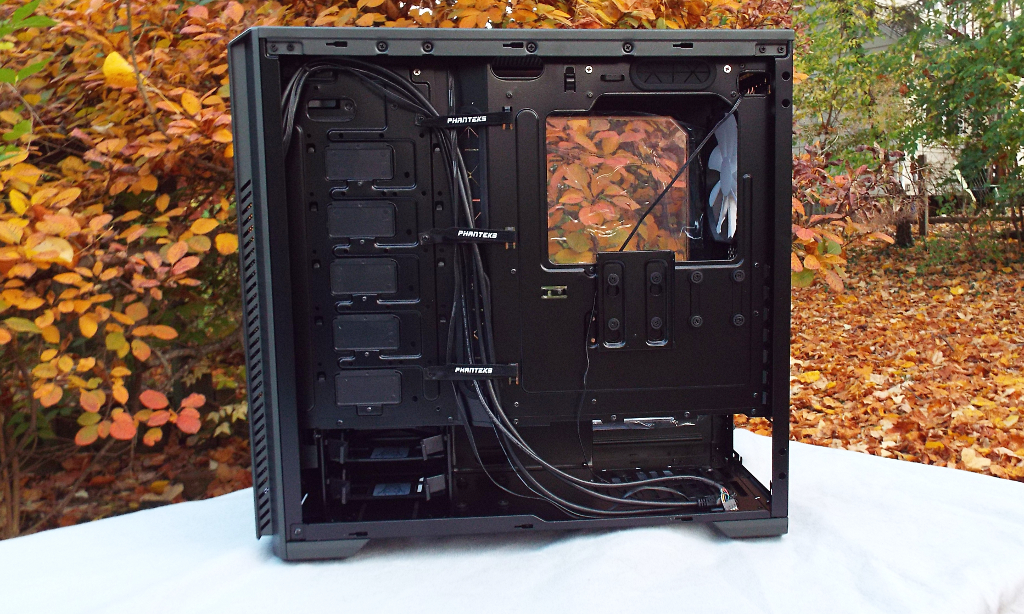
Moving around to the right side of the Enthoo Pro M, we find a generous amount of cable management clearance (32mm). At the bottom left we find the drive cage and its two slide-out trays for either 3.5″ or 2.5″ HDD/SSD mounting. Also, we can mount up to two more 2.5″ drives on the backside of the motherboard tray just below the CPU cooler opening. We also find present three Velcro straps sporting the Phanteks logo that help consolidate wiring and simplify cable management. Also present are a number of other slots and openings for securing cables to.
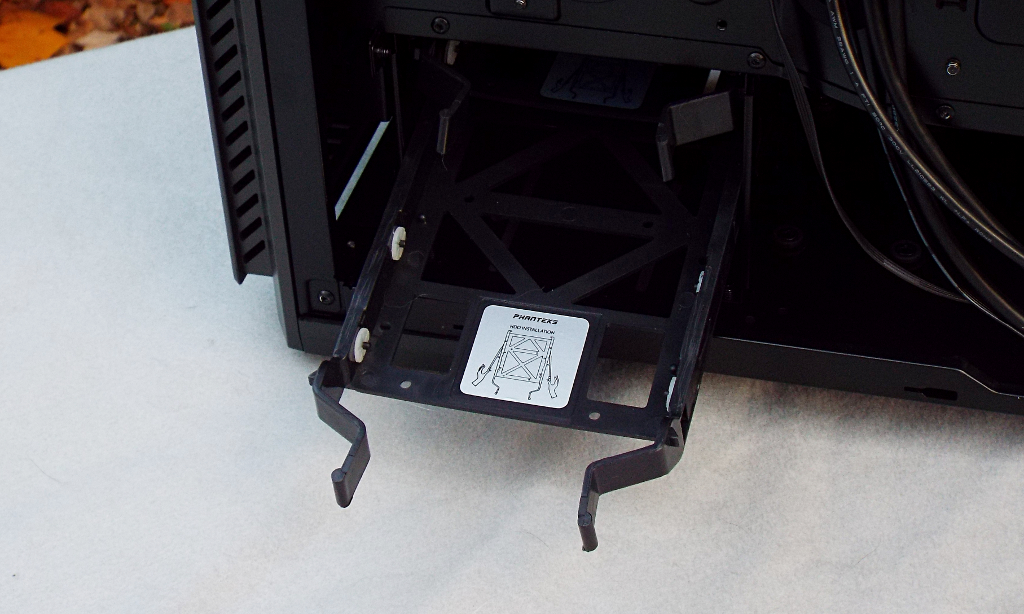
Here we see one of the two drive trays slid out but not removed. Cushions are present on the sides for 3.5″ drive mounting, while 2.5″ drives mount to the bottom surface of the tray.
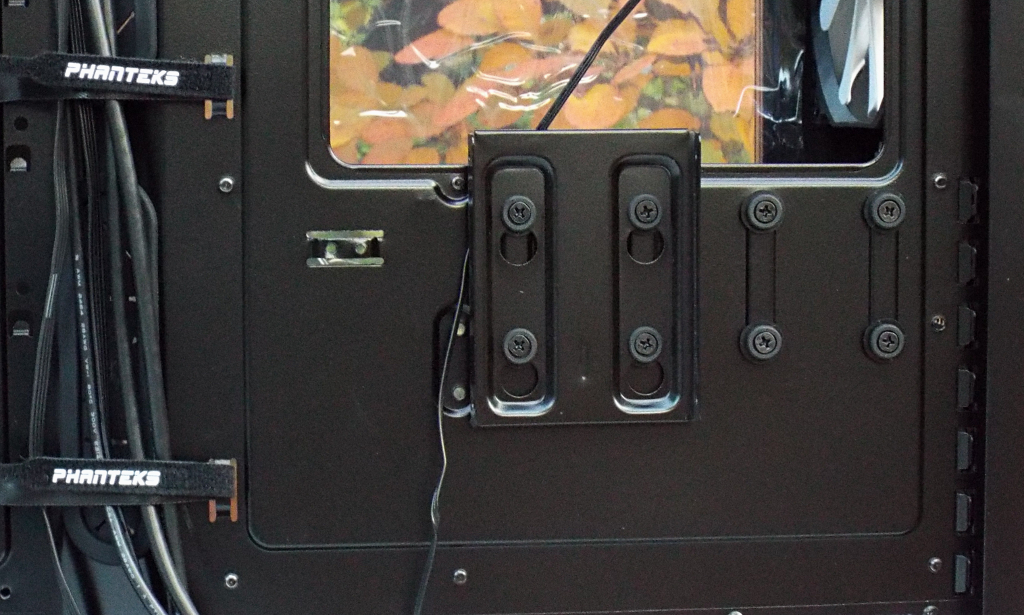
 Below we see a closeup of the rear SSD mounts, which feature a “drop and lock” tray to mount your SSD to. You can mount your SSD to the bracket, place the holes in the bracket aligning with either of the sets of four grommeted screws on the back of the tray, and slide it downward to lock it into place. Although only one of these brackets is supplied, you can mount this bracket in either of the two mounting positions shown here, as well as the for the front SSD mount. If you are using an aftermarket cooler, you might want to remove this bracket until after you have your cooler and motherboard mounted into place, and then reinstall the bracket.
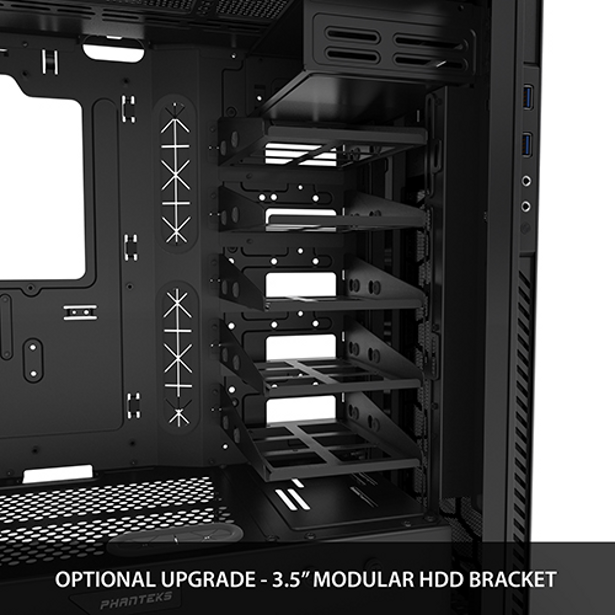
 Although one was not included with our review sample, Phanteks also offers an additional optional HDD/SSD drive mounting tray that installs on the front side of the motherboard tray toward the front of the chassis. These have tabs on the back that slide into slots on the tray and then push down to lock into place. In the image below, we see a total of five of these add-on trays mounted.
Review Overview
Product Build
Specifications
Features
Pricing & Availability
Warranty
Builder-Friendly!
The Phanteks Enthoo Pro M is one of the most builder-friendly chassis we have worked with.