
THE TEK-9 FAT 6.0 GPU POT
This pot is designed to allow you to cool your GPU with LN2 or DICE. The pot is more designed for a single or dual card, with double spacing applications and easy mounting kept in mind.
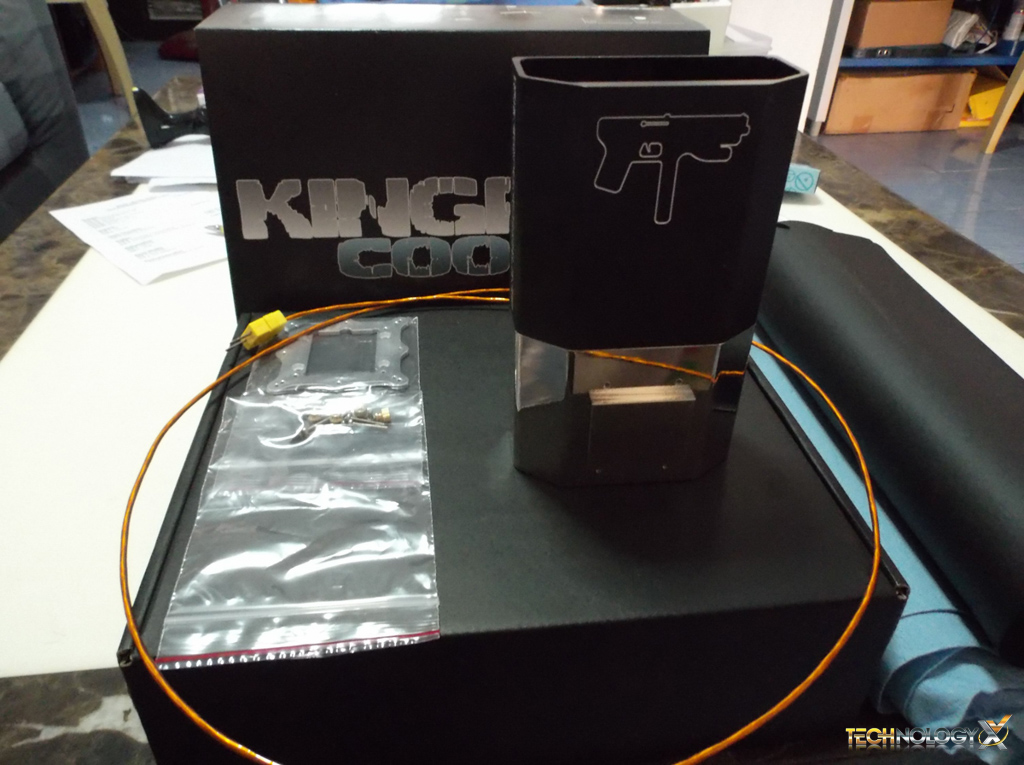
As the same with CPU pots, the Tek-9 Fat comes with mounting hardware which is simple to use.
Please see the Tek-9 Fat Product Page for more information and pricing. For more products available as well as ordering please visit Kingpin Cooling.
LN2 AND DICE SUPPLIERS
To find a decent supplier you should check out gas companies, universities, welding or ice cream shops within your area. Check out online or even ask on HWBot and other technology forums for advice where to buy LN2 or DICE in your area. If you decide on LN2 you will have to look at buying a Dewar or Cryogenic tank which are very expensive. To overcome this expense you might find used on eBay or technology site marketplaces. Another option is to rent one if possible from your supplier.
USING LN2 AND DICE
Once you have mounted your pot it is a good idea to test the mount while the pot is warm. The way to do this is boot into BIOS at stock speeds and look at the BIOS reading for temperature and compare the reading on your digital thermometer if you have one. The delta should be no more than 4 degrees C, with the CPU reading in BIOS being the higher of the two. You should let it sit for a moment, then boot into windows as this will help spread the TIM as well. If you do not have a digital thermometer, still do the same and from there you should be good to go.

Now you can start pouring LN2 into your pot. To do this you pour LN2 out from your Dewar and into a nice size coffee thermos and from there your pour into your pot. Once you hit around -50C boot and check to make sure your have not hit the CBB we talked about earlier. At this temperature you should be fine, so for every 10C drop you can test again. Everyone has their own methods, but this is how we like to do the CBB check. Now you can start overclocking and testing benchmarks.
Using DICE is similar except you need something for the DICE to react with. The best chemical found to use with DICE is Acetone. Acetone mixed with DICE will be around -88C ideally and you should not have to worry about coldbugs, as with LN2. We recommend that you try to buy your DICE in pellet form or 1KG blocks, then crush it up for maximum surface area. Before you start adding DICE you must pour in some Acetone, as you can see in the pot pictures they have holes drilled in them, pour enough Acetone to cover the holes in the pot so they are slightly overflowing. Again bring the pot down to the lowest temperature and start overclocking. It is important to note that Acetone is flammable, so do not use it near a flame!
Another item which you can get cheap is a digital multi-meter or two, these are good for watching core, PLL, vmem voltages and so forth while running your hardware under load.
WARNING: Please look at safety measures when using LN2 or DICE!
THE BASICS OF INSULATION
Some people are afraid or nervous the first time they use subzero cooling, which is expected. The most important thing you must do is the insulation process, as this will protect your hardware against shorts from condensation. There are a few methods of insulation that can be used, which include Kneadable Art Eraser, Liquid Electrical Tape (LET) and even Vaseline. Our preferred method is using art eraser on the top side of the motherboard and coating the back of the motherboard with LET, which you can get in a paint can or spray on. If you decide to use LET, put on a few good coats so it is thick and therefore easy to remove once you are done with the hardware. It will take about 24 hours to dry.
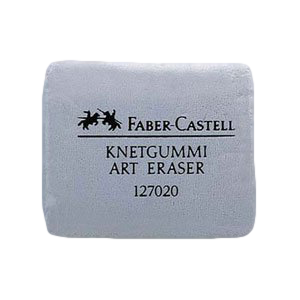
You will need about 6 – 8 blocks of Art Eraser to do the insulation job properly and the most important areas are around heatsinks, as they should be sealed off from air, as any air that may get into the area of what your VRM heatsink covers may cause condensation to build up leading to a short. Do not let this scare you as it is easy to do once you take a good look at your motherboard. For extra insulation normal paper kitchen towels work just fine, although we recommend Industrial Blue Shop Towels such as this as an example.

To protect any unused RAM and PCIe slots, they can be covered with Blue Painters Tape as well will see later.

Blue Painters Tape can be found at any any home improvement store or online. We will continue the insulation part further on with pictures.
Why don’t you just use conformal coat the insulate the board from moisture, that’s what it’s designed to do? We use Humiseal 1B31 at work for military boards. It glows blue under UV too so would look groovy at an event if you could get some black lights =P
Hi,
I have toyed with idea of using conformal coating and just need to get some. Thanks for giving me a product name. i will also look out for others and not much in conformal coating is available here in Thailand so will have to probably import it. Not a problem tho and your right it does work and would look nice with some UV lights 🙂
Thanks for the article! Very well written. It’s classified as hazardous material so transporting usually has an extra cost along with certain rules. Check into that before ordering =) Generally we buy from https://www.ellsworth.com/products/conformal-coatings/
or the like, but I think you can even get it on Amazon.
Thank you for comments, I will certainly look out for that product as well. Much appreciated your kind words too 🙂
Hello,
great guide
I have my own method i use, it is a combination of common insulation methods.
Required Materials:
Vaseline
Eraser
Liquid Electrical Tape
Electrical Tape
Neoprene Insulation
Armaflex.
paper towel
Painters tape
Sorry i have no photos so i will half to describe it to the best of my abilities, if you have any questions just ask.
Step 1
Remove everything and anything that can be screwed off of the board. This includes the heat sinks and cpu security bracket.
We are going to be covering the top of the board in a thick layer of Liquid Electrical Tape, this will make a water proof seal. if the liquid tape gets under a pci slot then it is stuck there. The board will still work but your chance of RMA has greatly diminished lest something bad happen. To prevent this we are going to take the eraser and roll it into long strips, place the thin strips in any tight space where the liquid tape won’t be able to be removed. This means sealing off the bottom of PCI Lanes, The edge of the cpu socket, Mosfets in the power delivery. Use your common sense.
Step 2
Now that all your tight spaces are sealed off take your LET and start painting it across the board. Your probably going to want to put a cpu in the socket to prevent it from dripping into the socket and ruining your board.You want to paint a thick layer, remeber there is no such thing as to much tape. The more tape you us the easier it is to remove. Generally you shouldn’t be able to see the colour of the pcb through the tape. (pro tip, well the paint is what you should poke through any mounting holes, it will save you alot of time)
Step 3
Rub Vaseline into the PCI and DIMM slots that you are using, its ok it can be removed completely with a blow-dryer. Apply Vaseline to the cpu socket. Just carefully place a small amount of Vaseline in the centre of the socket and then hit it with a blow dryer to spread it around the socket. Keep doing this until you have gotten decent coverage in the socket.
Step 4
put everything back on the motherboard,
Step 5 (optional)
You can now apply a layer of LET to the back of the board, there isn’t anything that needs to be sealed with eraser, this only takes a few minuets and creates extra protection but ins’t that necessary.
Step 6
Place the board on a sheet of Neoprene, this will seal the back of the board off completely and is why step five is not to important. sandwich the neoprene between backplate of your mounting system and the motherboard. Poke wholes for the screws so that the neoprene gets pressed into the board once you apply the pot.
Step 7
wrap your pot in a layer of painters tape and then wrap it in a thick layer of armaflex insulation tape.
From here you can follow Stuarts guide starting at page 4.
Sorry if it was unclear in anywaym, i did my best.
As me anything if you need
Thanks Sean,
Great layed out method you use, certainly solid 🙂