INTERIOR
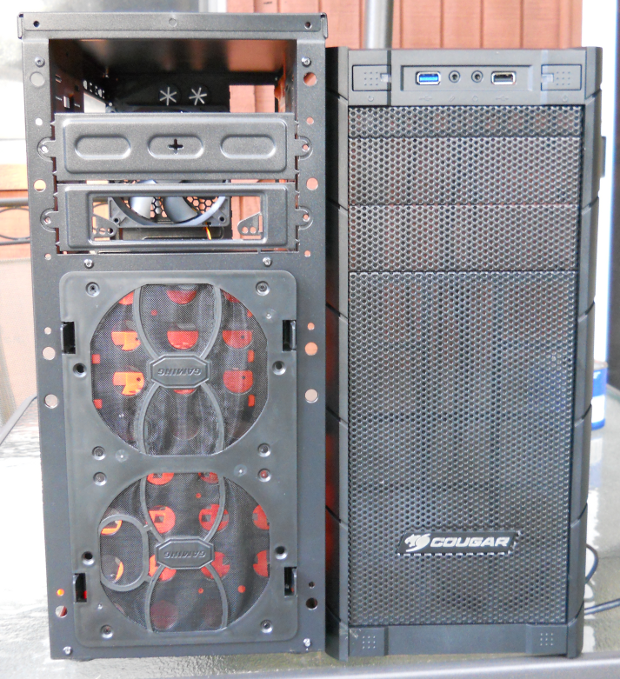
Let’s begin our look at the interior of the Cougar Archon by removing the front panel. The inside of the front cover is lined with a foam filter material, including the removable drive bay covers. The drive bay covers are held in place by spring-tension plastic tabs, and are able to be removed (or reinstalled) very simply. They snap back into place with a satisfying “click”.
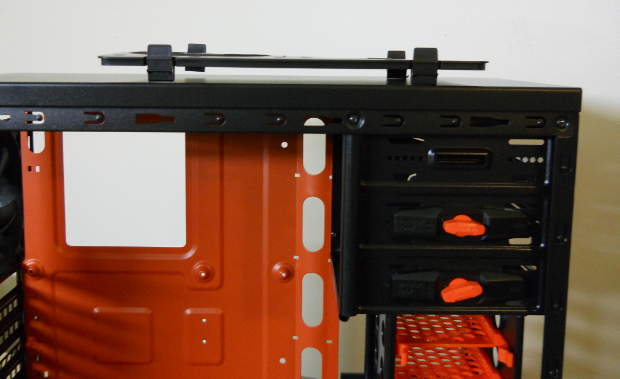
In the image above, the lower two thirds of the case front holds the removable filter in place with four plastic spring-tension tabs. The filter had a difficult time staying in place in our review sample, but that was largely due to the filter housing being warped, as you can see in the image below with the filter lying on the smooth, flat top panel of the case.
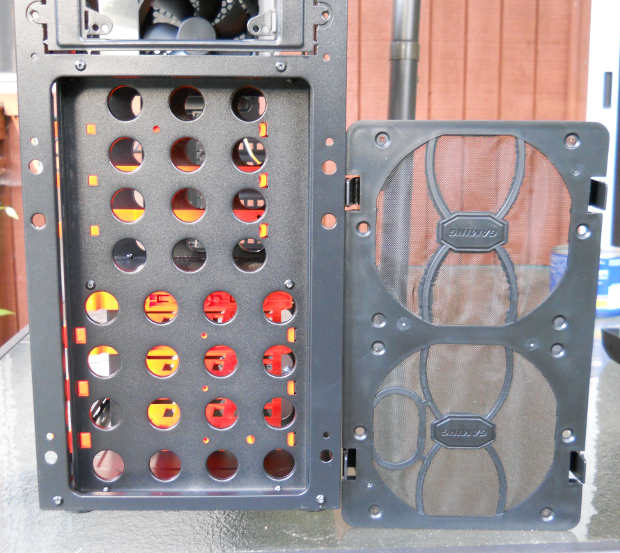
Next we see the front filter removed, exposing the cavity behind that will “house” the front fans. The panel at the back of the fan cavity is also the side panel of the hard drive cages. The lower 4 x 4 holes correspond with the 3.5″ cage, while the upper 3 x 4 holes correspond with the 2.5″ cage. Note the lack of mounting holes for the fans in this panel — we have to mount the fans directly to the fan filter! More on this unusual setup when we get to the hardware installation portion of this review.
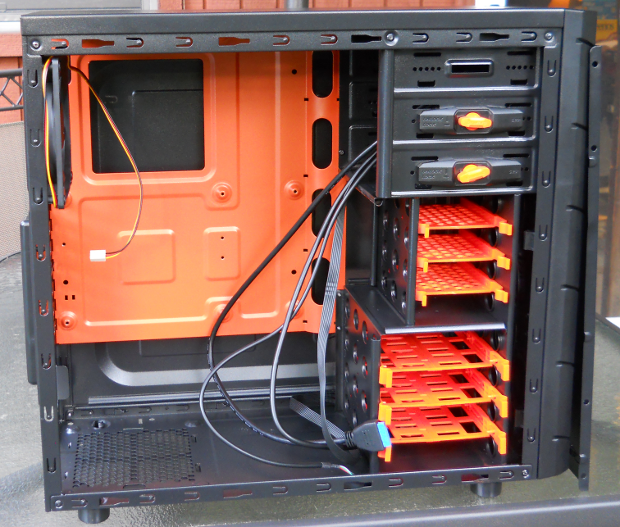
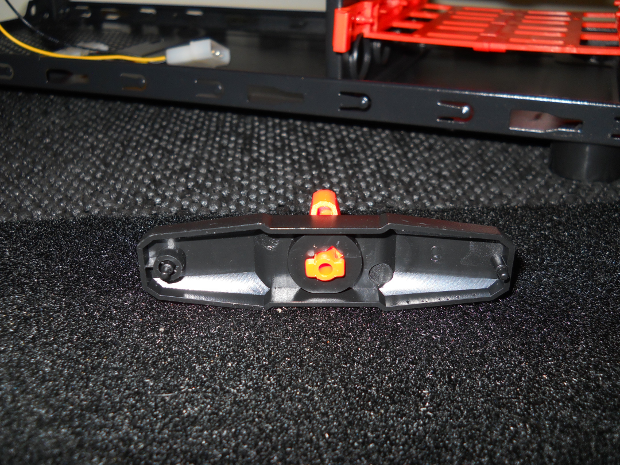
Now we move to the interior of the case itself. Note the position of the cutout in the motherboard tray for installing an aftermarket CPU cooler. Rarely does this type of opening line up exactly with a cooler’s backplate due to motherboard variations, but this one is further off than most. Pre-installing the cooler to the motherboard before securing it into the case would be your best bet here. Note the two hard drive cages, with the lower one stacking three 3.5″ trays for HDDs, and the upper one stacking three trays for 2.5″ HDDs or SSDs. Unused trays can be removed to improve airflow. Also note the two orange knobs above the hard drive cages — these are the locking mechanisms for the 5.25″ / optical drive bays.
This tool-less mechanism utilized in the Archon is a very simple, yet effective mounting method. Line the face of your optical drive up with the outer face of the front panel. Make your minor adjustment to align the screw holes in the side of the optical drive with the holes in the side of the drive bay. Place the locking mechanism up to the side of the drive bay and insert the pins at either end of the lock through the side of the drive bay and into the screw holes in the side of the optical drive. Rotate the orange knob ninety degrees, and your optical drive is securely attached. There is no locking mechanism on the opposite side of the drive bays.
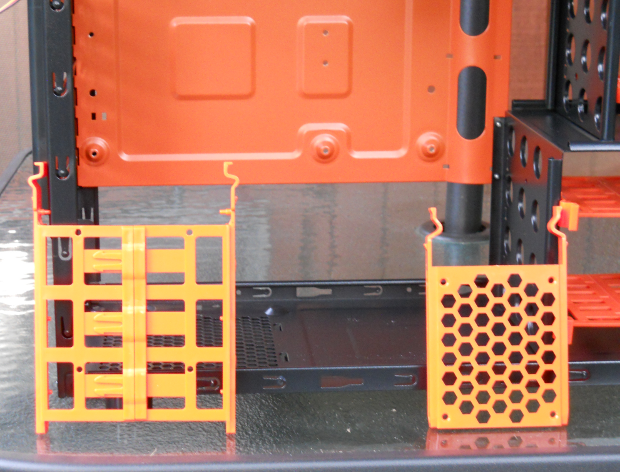
In the next image, we see the two sizes of HDD/SSD trays out of the drive cages. Both sizes of trays offer screw holes on both the sides and on the bottoms. Both trays slide in and out effortlessly, and snap into place firmly. Again, any unused drive trays can be removed to improve airflow inside the case, especially if you have a front fan (or fans) installed.
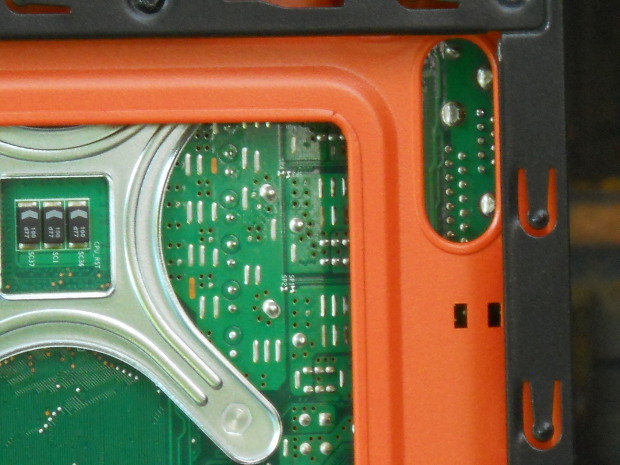
The image below is a post-hardware-installation close-up of the backside of the motherboard tray. Note the oval wiring hole at the top right. The placement of this hole is rather baffling, as we can see that it is totally blocked by the motherboard. We can also see in this image the lack of room behind the motherboard tray. A slight bulge in the right side panel will help, but cable management may prove to be a bit of a challenge in the Archon.
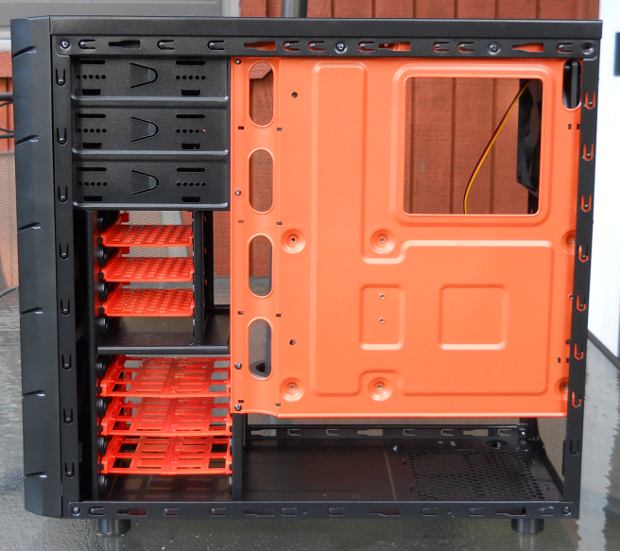
Here is the full side view of the right side of the Cougar Archon. Note the section at the left side of the motherboard tray with the four oblong oval wiring holes. This section actually curves inward from the tray and is attached to the back end of the drive cages and drive bays. This extra flange helps conceal the wiring, has effective hole spacing to help with cable management, and offers a number of anchor points for cable ties. We did find this to be a definite positive point for the Archon. Cable management at this end looks a bit more promising.
 Technology X Tomorrow's Technology Today!

The worst rewiew in the world.
“Unfortunately, we will have to relegate the Archon to the “Not Recommended” list.”
Have you seen the price for this case?
For 40$ this case is the best buy!
i have this case.. did not encounter problems snapping on the I/O shield nor having to run any of the front panel cables in front.. only downside i can see would be
1. the lack of fan mounts on top, for better cooling or rad mounting and
2. when placing 120mm fans on the side panel, you cannot put in aftermarket coolers like the cm hyper 212 evo or deepcool gammaxx 400. (you can if you leave the side panel open). you can go wtih watercoolering options like corsair h60. for the price, this is still a fairly nice case.