
Features and Build
Today we tried to see how much power we could pack into this chassis. Follow the links if you want to add any of our components to your next build!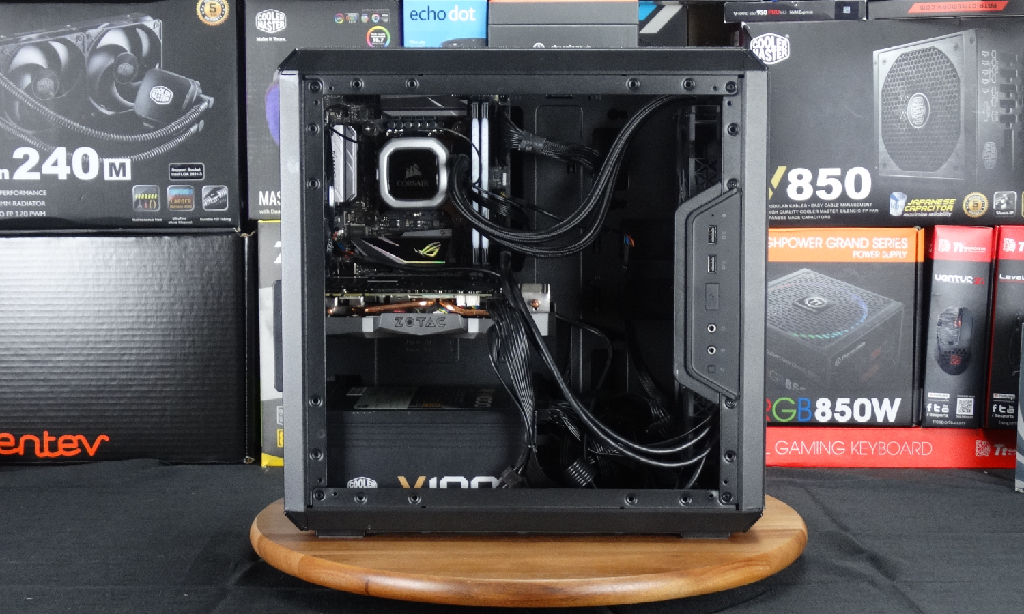
| Chassis | Cooler Master Q300L |
| Motherboard | Asus Strix Z270i Gaming |
| CPU | i7 7700k |
| RAM | Viper White LED 16GB RAM (2x8GB) |
| Cooler | Corsair H115i Pro RGB AiO |
| Graphics Card | Zotac Geforce GTX 1070ti mini |
| PSU | Cooler Master V1000 |
| Storage | Samsung 950 Pro M.2 NVME |
Today’s build went fairly flawlessly. With the only option for coolers to place the fans and the radiator inside it will add time to your build as you fiddle around with the fans, looking for the radiator screw holes if you set the fans up for push. We decided to simplify and go with a pull-setup.
We were a little surprised when we took a second look at the specs. Fitting only up to a 240 AiO in the front, it also says you can choose to put 2x 140 fans. So, why not a 280 rad?
We messed around with it for about half an hour trying to find any holes in the front honeycomb design that would support our 280 AiO.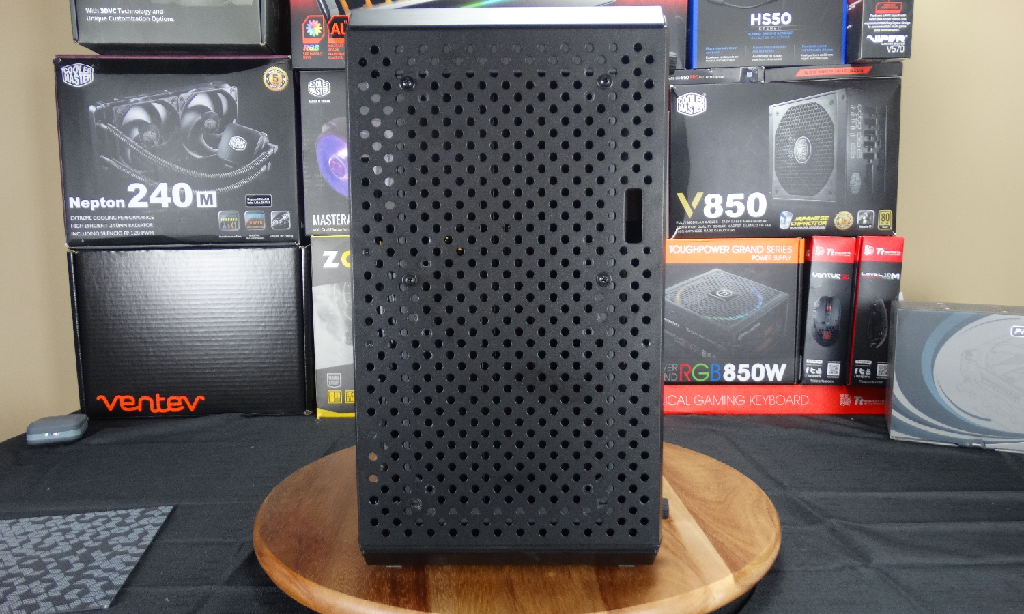 As you can see from the photo above, we eventually gave up and settled with securing it using four screws. In all honesty as long as you torque them properly you shouldn’t have any issues with vibration as we had no issues with our even pumping the fans to max RPM.
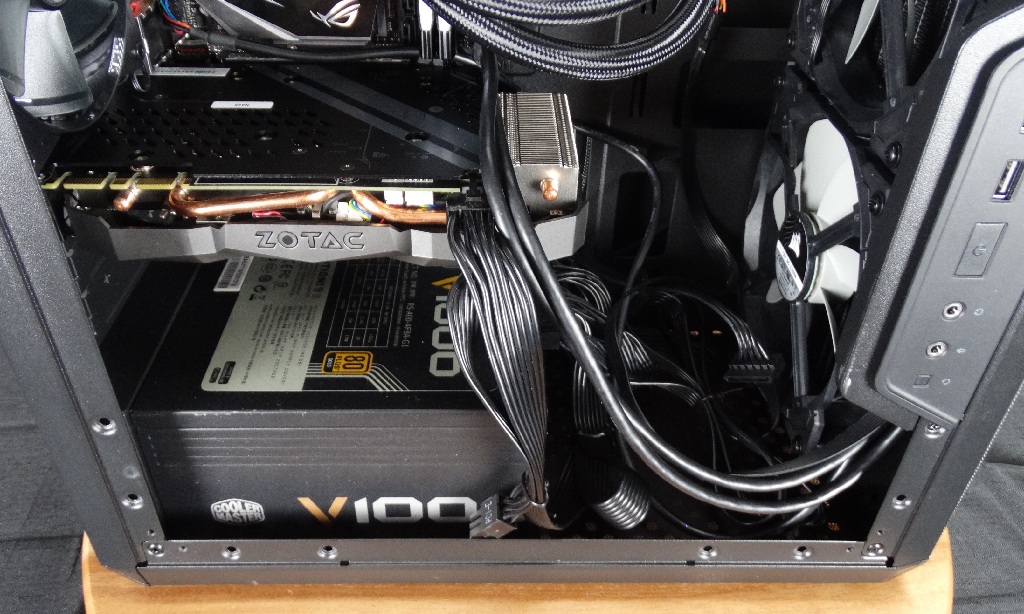 As for interior space we ran into no issues with our components but as you can see cable management is a little less than desirable. That tends to happen without a PSU compartment cover.
 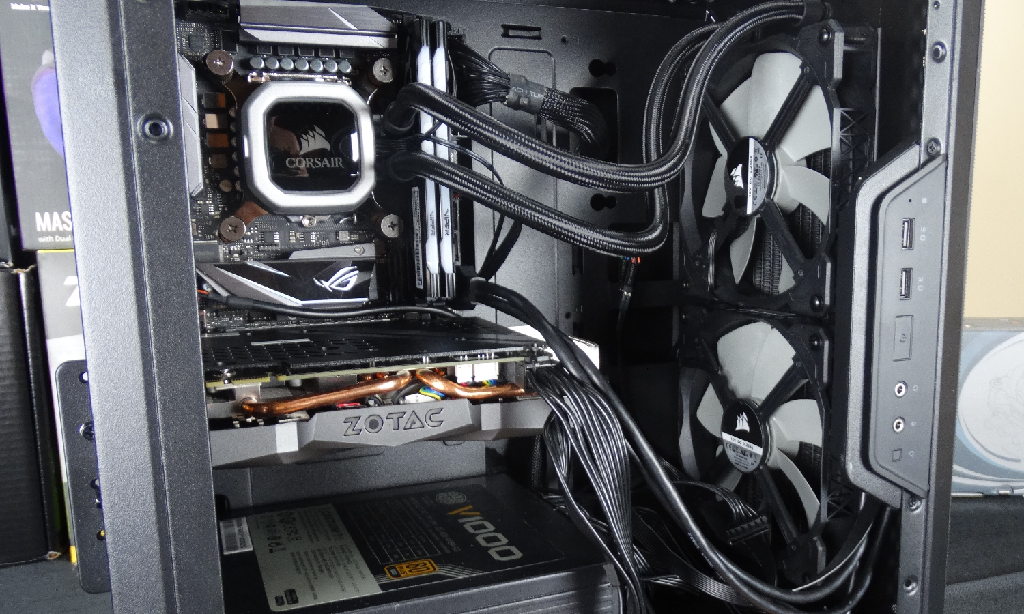 We believe Cooler Master leaned away from the ability to house the 280 rad in order to ensure you could mount your 2.5″ drives in the main compartment but even with the 280 you could mount them on the cable management side.
For a mATX/mITX chassis the Q300L is quite spacious.
Final Thoughts & Analysis
Our experience building with the Q300L overall, we’d give it a B+. While the capacity for larger components there is definitely some room for improvement on this chassis.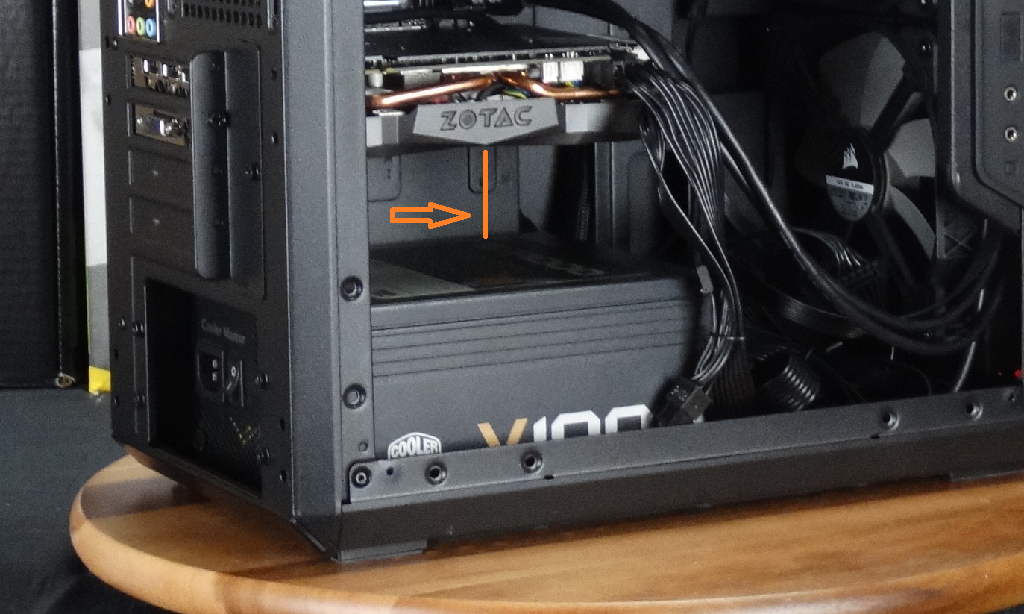 The above shows about two inches of free play below the graphics card. We’d like to see a little more adjustment to the possibilities of lowering the motherboard when using a mITX in order to give more play at the top to install a top rad. While that wouldn’t be possible with a mATX board because it would hinder the four expansion slots, it would be an added benefit to the customization of this chassis for mITX builds. It also wouldn’t take too much extra to ensure the honeycomb design suited a 280 rad as well.
  We were impressed with the ability to house those larger components and the ability to move the I/O panel to suit your preference. The magnetic top and front air filters are not only functional but add to the aesthetics of this chassis. At a $40 price point the Q300L is worth the price and has been granted a Bronze Seal.
CHECK OUT THE Q300L ON AMAZON!!!