
Specifications & Features
The first thing on everyone’s mind has to be. “Will this fit in the system I am building?” Posted here are the exact specifications as posted on the product box. Inherently this is a 360 mm radiator which means you can almost immediately rule out most Micro ATX and Mini ITX chassis. We can see this incorporated in anything from the mid tower chassis and up due to the fact that many companies are making a solid effort to support these larger radiators.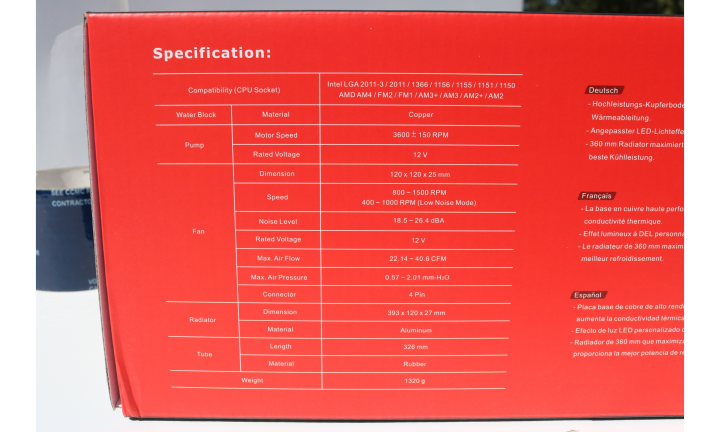 Exact dimensions of the radiator are 393 x 120 x 27 mm. As we described above if you are purchasing Thermaltake’s 3.o Riing 360 RGB take heed of the spacial requirements. We are excited to see if these fans live up to their lower noise level and to see how well they can push the air through the radiator. We see a little of a crutch in regards to the tubing length here. 326 mm is not a lot to deal with and we can see ourselves running into issues .
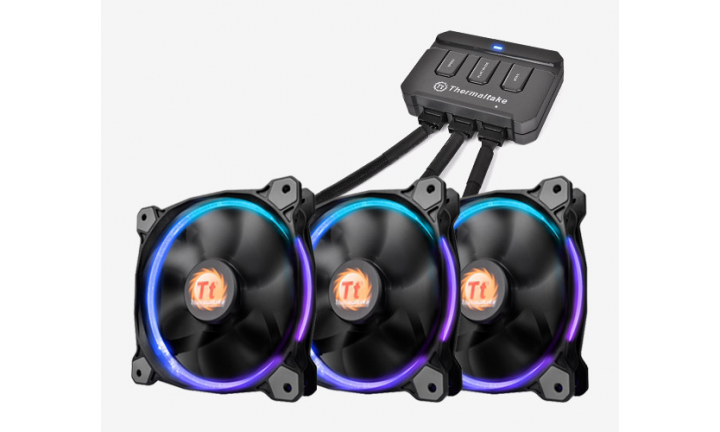 One of the many features we have here is Thermaltakes patented design for RGB fans. The Riing fan can be controlled by the included controller ONLY, which is an interesting decision because most other companies add the option of Mobo software.
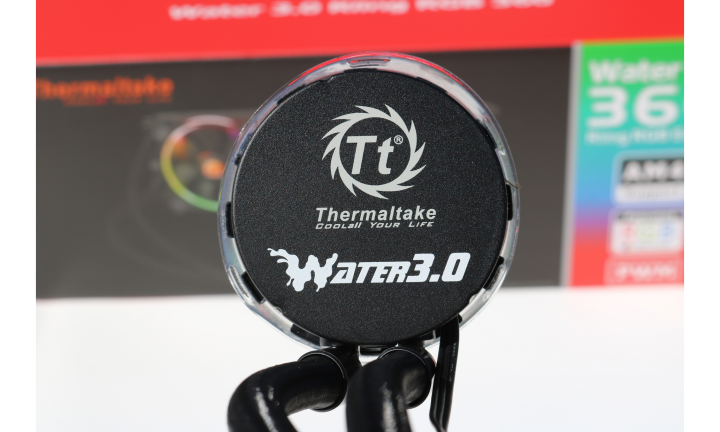
The pump has a few features to note as well. Thermaltake has added a high performance copper base that accelerates the heat conductivity. In addition the pump having a high reliability, low profile design that provides quick liquid circulation and eliminates the liquid replenishment hassle.
Installation and Setup
Some experts may say “Never go full simple”. Nobody actually says that, however, this install was very easy to build and probably the quickest we have done to date.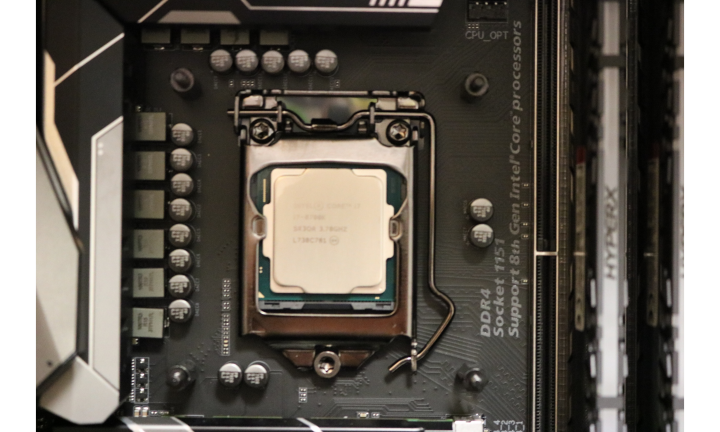 Our Intel back plate fit right in place for our Intel i7 8700k processor on our Aorus Z370 gaming 7 motherboard. Four thumbscrews sat right in place and we moved on to the radiator install.
 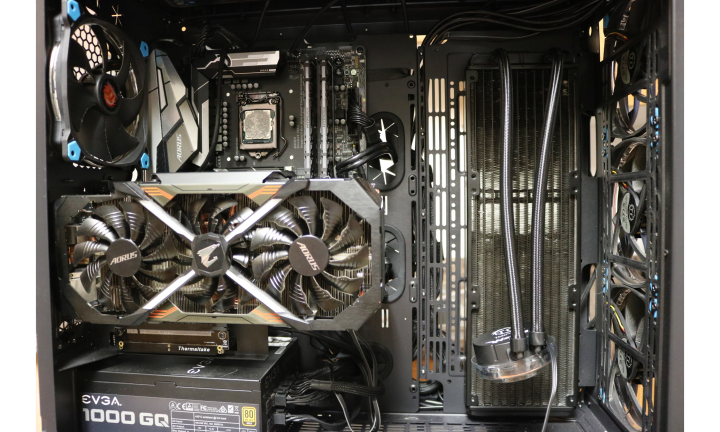 The View 71 is built specifically for Thermaltake products so one would think there would be ample room. There is specific screw holes on the wall of our chassis which we installed into without any issues.
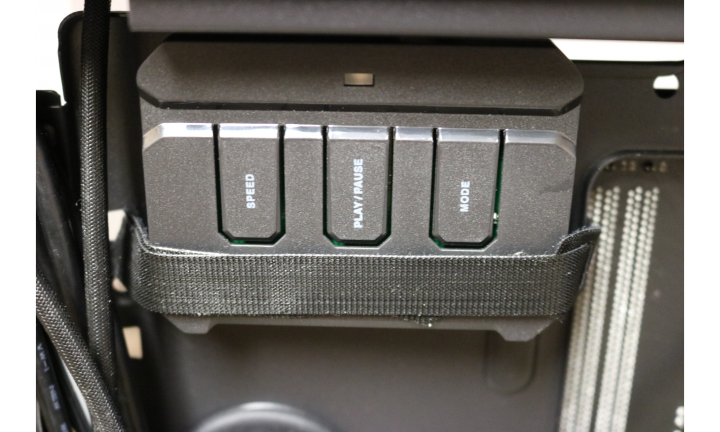 We installed our RGB controller on the back of the chassis with all the cables.Instead of using the provided Velcro, we attached it with a bit of our own ingenuity.
 On the pump there is a new two bracket system. One bracket holds the other and they snap into one another. We don’t really see a reason to have these two brackets together when you could just attach one but this is not that huge of an issue.
 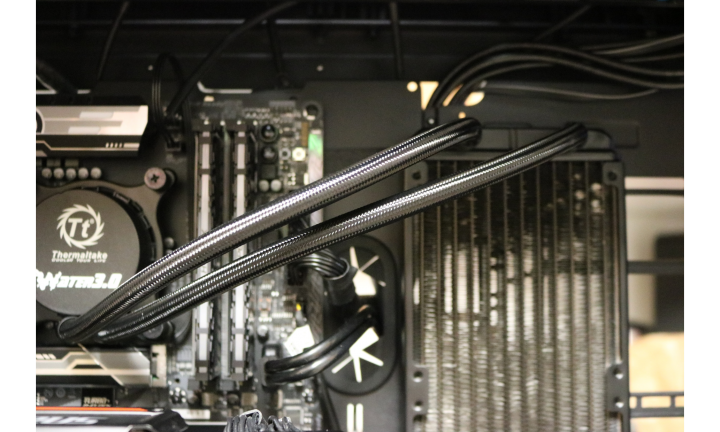 On our final approach to Cool city we found the length of the tubing to be just enough. As you can see, our tubing is very close to its maximum distance and issues may arise if building in a non Thermaltake chassis.
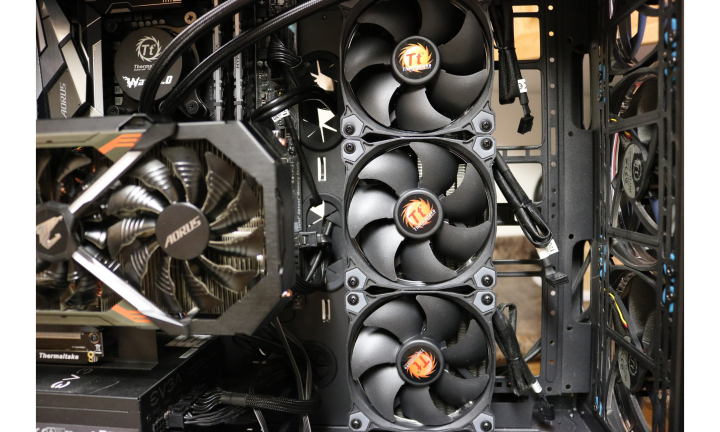 All in all we are happy with the way the build went.