SYSTEM ASSEMBLY
Below is the list of components we will use for this build. Click on each product on the right side of the chart to be taken directly to the product page for that item.
- Motherboard: ASRock Z170M Extreme4 mATX
- Processor: Intel i5-6400 Skylake
- CPU Cooler: NZXT Kraken x42 all-in-one liquid cooler
- Memory: Corsair Dominator Platinum 32GB DDR4 2800
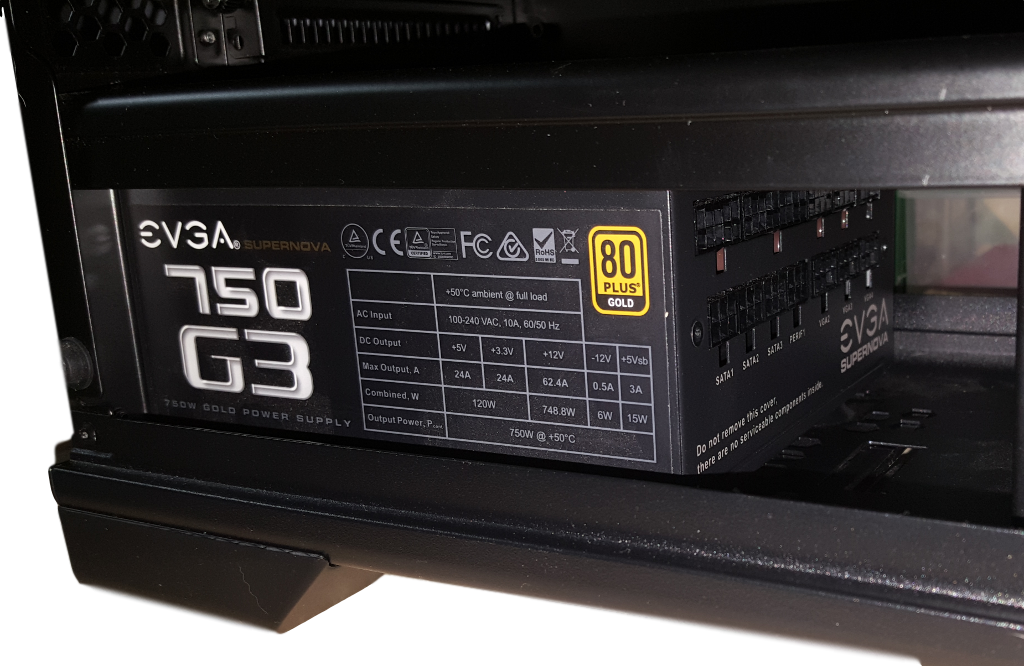
- Power Supply: EVGA SuperNOVA 750G2 80+ Gold 750w
- O/S Drive: OCZ RD400 PCIe NVMe SSD 512GB
- Storage Drive: Intel SSD DC3700 SATA SSD
- Graphics Card: EVGA G-Force GTX730 4GB
Check out ASRock Z170M motherboards on Amazon!
Check out the Intel i5-6400 Skylake processor on Amazon!
Check out the NZXT Kraken X42 140mm all-in-one CPU cooler on Amazon!
Check out Corsair Dominator PlatinumDDR4 memory on Amazon!
Check out the EVGA SuperNOVA 750G2 80+ Gold Power Supply on Amazon!
Check out OCZ (Toshiba) RD400 SSD on Amazon!
Check out Intel DataCenter DC3700S SSD on Amazon!
Check out EVGA G-Force GTX730 4GB on Amazon!
We prefer to begin any system build with installing the power supply first. We then pre-route the bulk of the cables and tie them off close to their final location. This saves finding out after the fact a case does not have large enough openings or inadequate clearance for routing cables after components have been installed. This seems to occur more with CPU power leads than with other components, so let’s just start with a non-issue in this area. This also makes it easier to keep our cable management tidy as we go. And of course, use of the EVGA SuperNOVA fully modular power supply eliminates any unneeded cables.
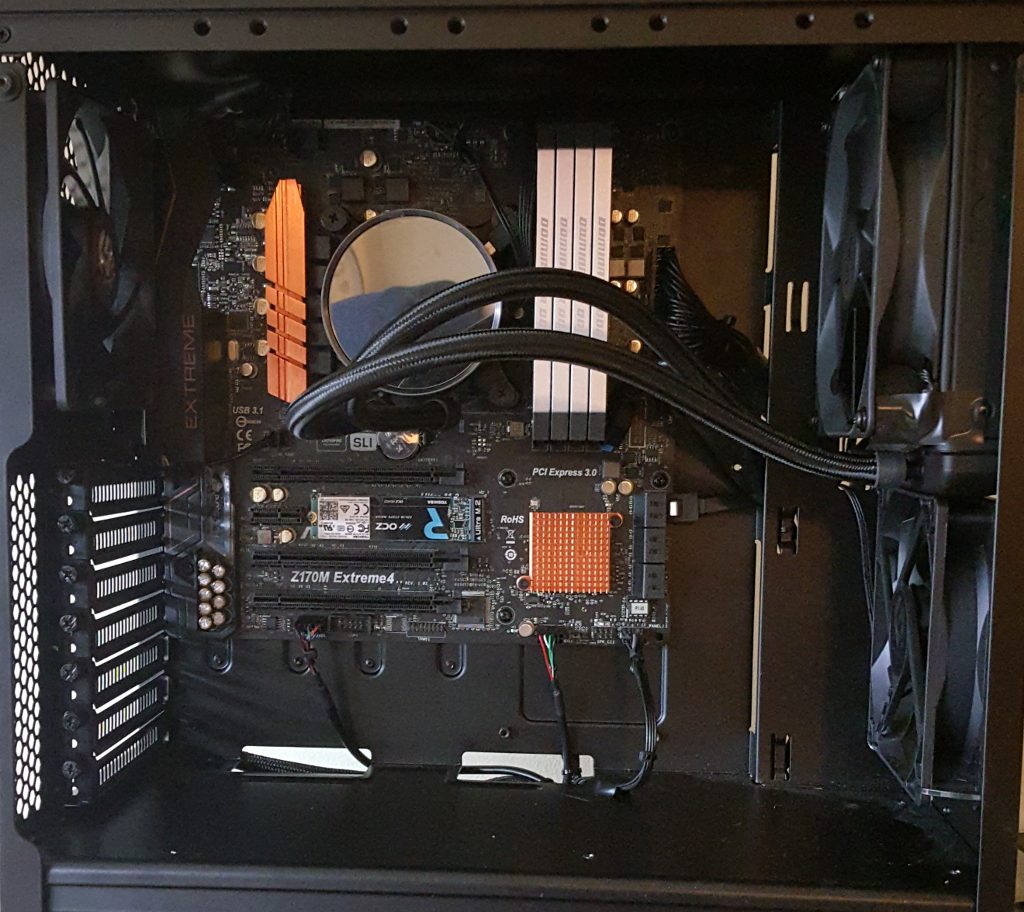
 Next we will install the motherboard “assembly”, with the memory, the OCZ RD400 SSD and the Kraken cooler already pre-installed. We also need at this point to mount the radiator for the Kraken in one of the front fan positions, as the 140mm radiator will not fit in the 120mm rear fan area. One point of disappointment was that there is no pre-drilled hole for an additional motherboard mounting standoff in the lowest, right-hand position of the motherboard. This means that this corner will not be secured, or that you will need to drill and tap you own hole to be able to secure this corner. This corner of the motherboard does not carry much weight, so this may be a non-issue depending on your level of finicky. Also, only a single extra motherboard mounting standoff was included in the hardware package that comes with the NEO, whereas at least two extras are required for an mATX motherboard, and three or four extras for an ATX form factor motherboard.
After removing both of the pre-installed MetallicGear 120mm fans, we discovered in mounting our Kraken 140mm radiator, which can be mounted in either the upper or lower fan position, that using this radiator in the front renders the second fan position unusable, unless you choose to mount a second fan here with zip ties or by drilling your own holes. The radiator extends into the other fan area, and effectively blocks both the 120mm and 140mm mounting holes. We have chosen to go with a plan ‘B’ of using zip ties to secure one of the MetallicGear 120mm fans in the lower position, with the Kraken radiator in the upper position. We will re-use the other MetallicGear 120mm fan that came with the NEO in the rear exhaust position.
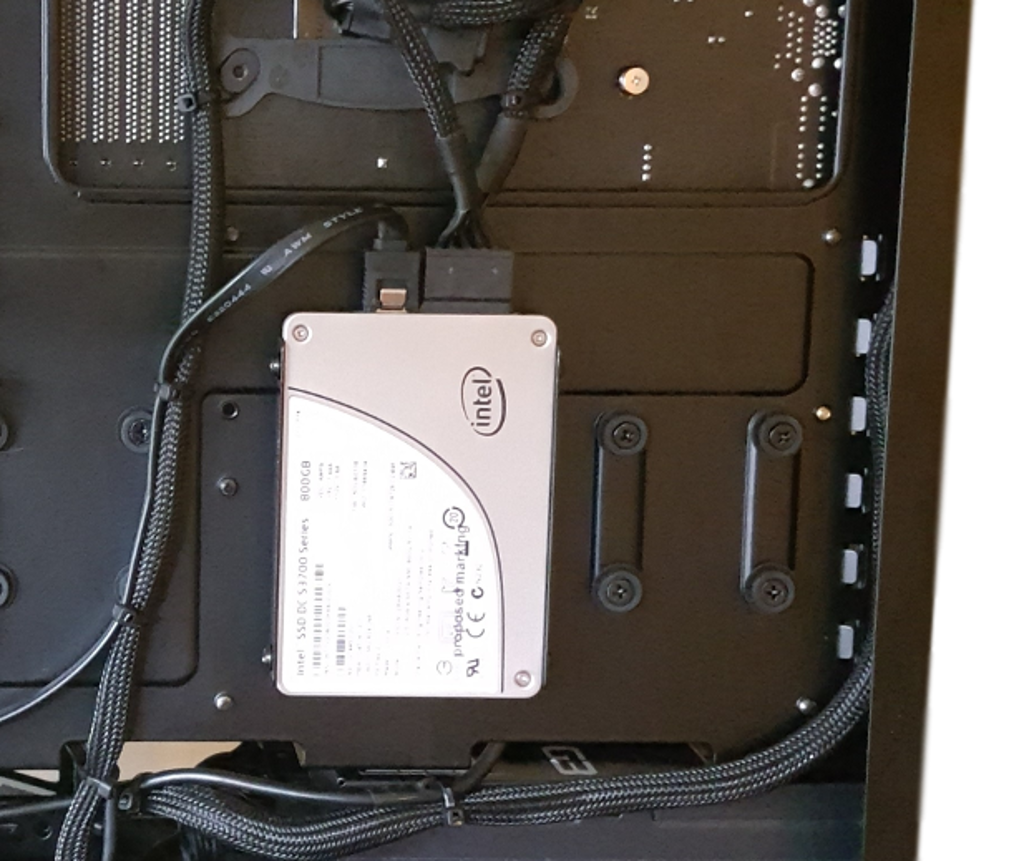
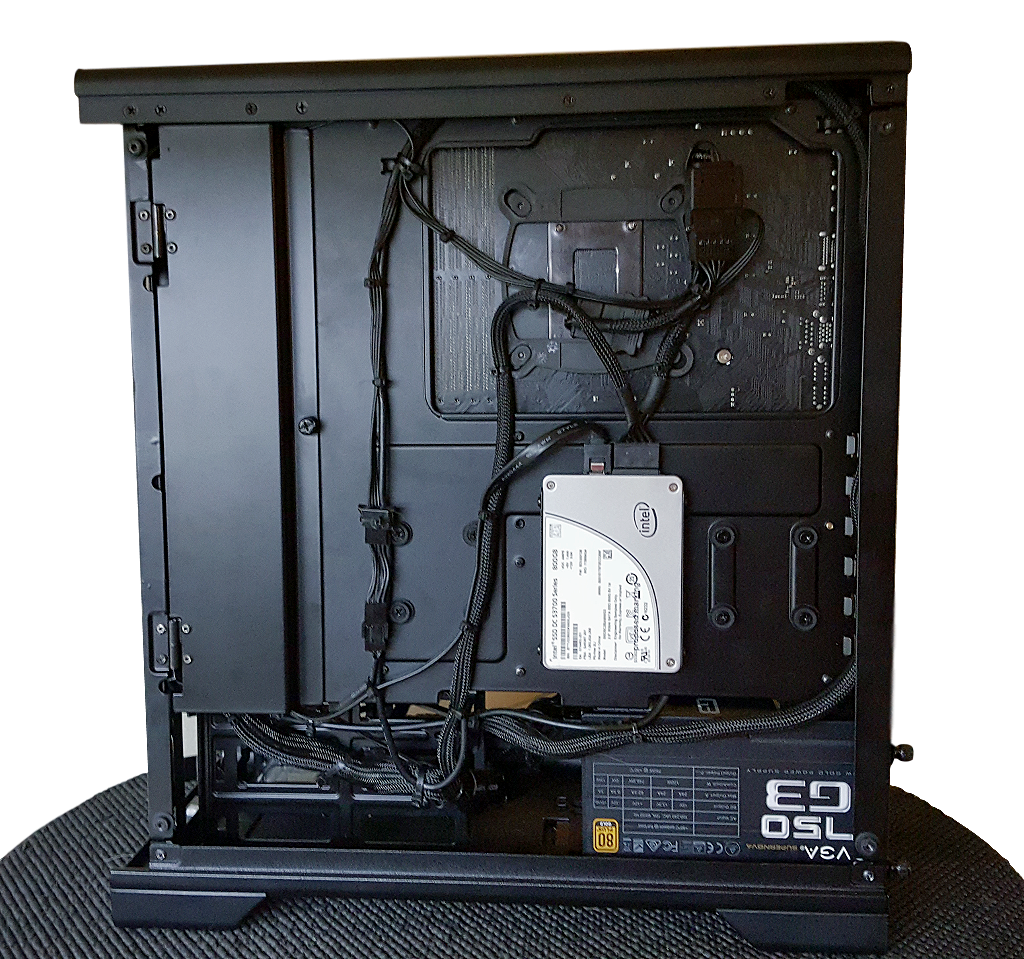
 We will now install the Intel DC3700 SSD into one of the SSD trays on the rear of the motherboard tray. We will leave the second unused 2.5″ drive tray off of this build, as it is not required.
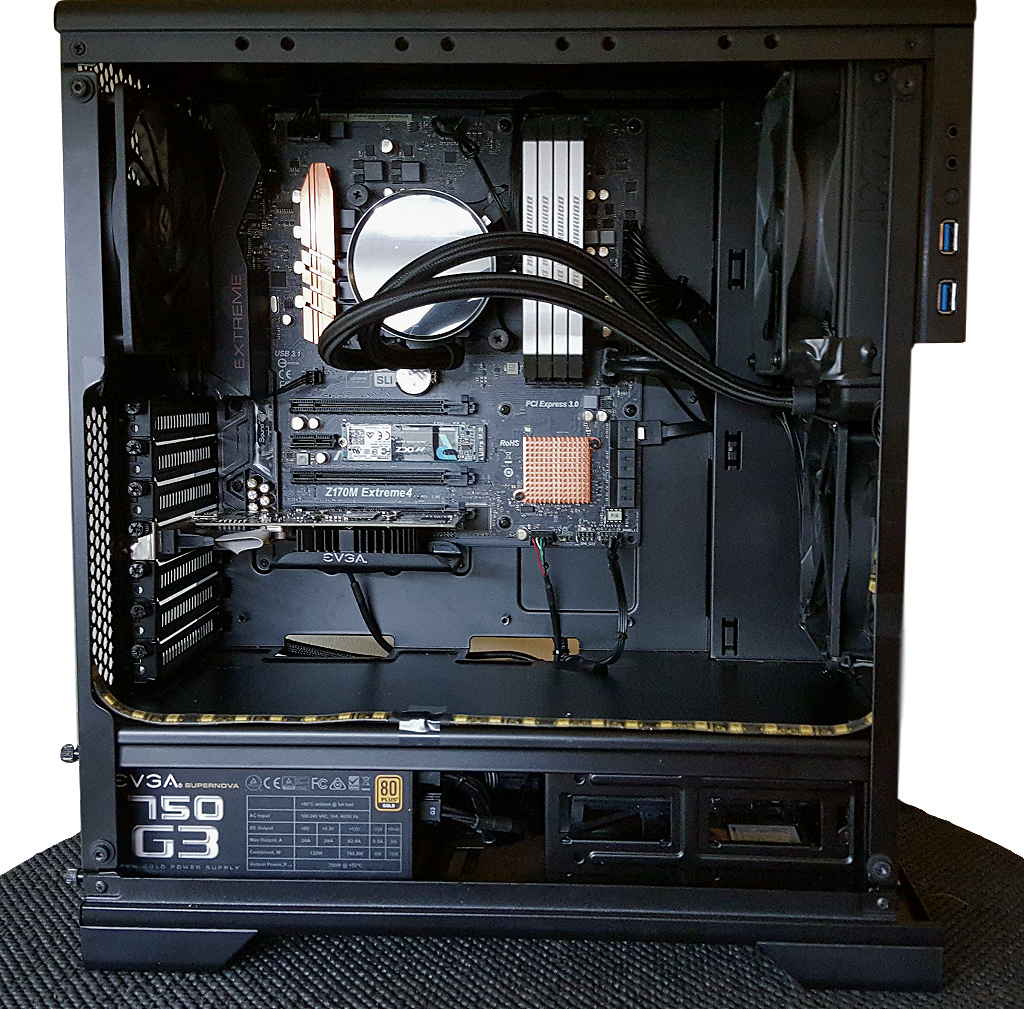
 We have on hand a couple of compatible LED strips, which we will install next so that we can check out this feature of the NEO chassis. It is also time to install the graphics card into the designated PCIe slot. The first image in the “Cable Management” section that follows also shows the graphics card and LED strip(s) installed.
CABLE MANAGEMENT
The NEO has a generous 36mm of cable clearance between the right side panel and the backside of the motherboard tray. Using a fully modular power supply makes for a much tidier build, as any unneeded cables are eliminated completely. Looking at this build from the left side of the chassis reveals that nearly all of the cables divert immediately out of sight behind the motherboard tray (for motherboard-connected cables), and also nearly immediately out of sight for other components such as fans or the LED lighting. Below we see the results of our cable management efforts, producing a very tidy build indeed.
Looking at the build from the right side, once we use cable ties to consolidate the wiring wherever possible, and being nicely concealed by the vertical “door” at the front of the right side, the result is a very clean build. Again, airflow is of extreme importance in any PC chassis, and even minor improvements in airflow achieved by intelligent cable management can only aid our chassis cooling efforts. Below we see the results of our cable management on the right side. What a difference concealing the wiring jumble at the front of this chassis makes! Most cases do not have tempered glass right side panels also, and the appearance on this side needs some consideration too depending on where you plan to position this chassis.
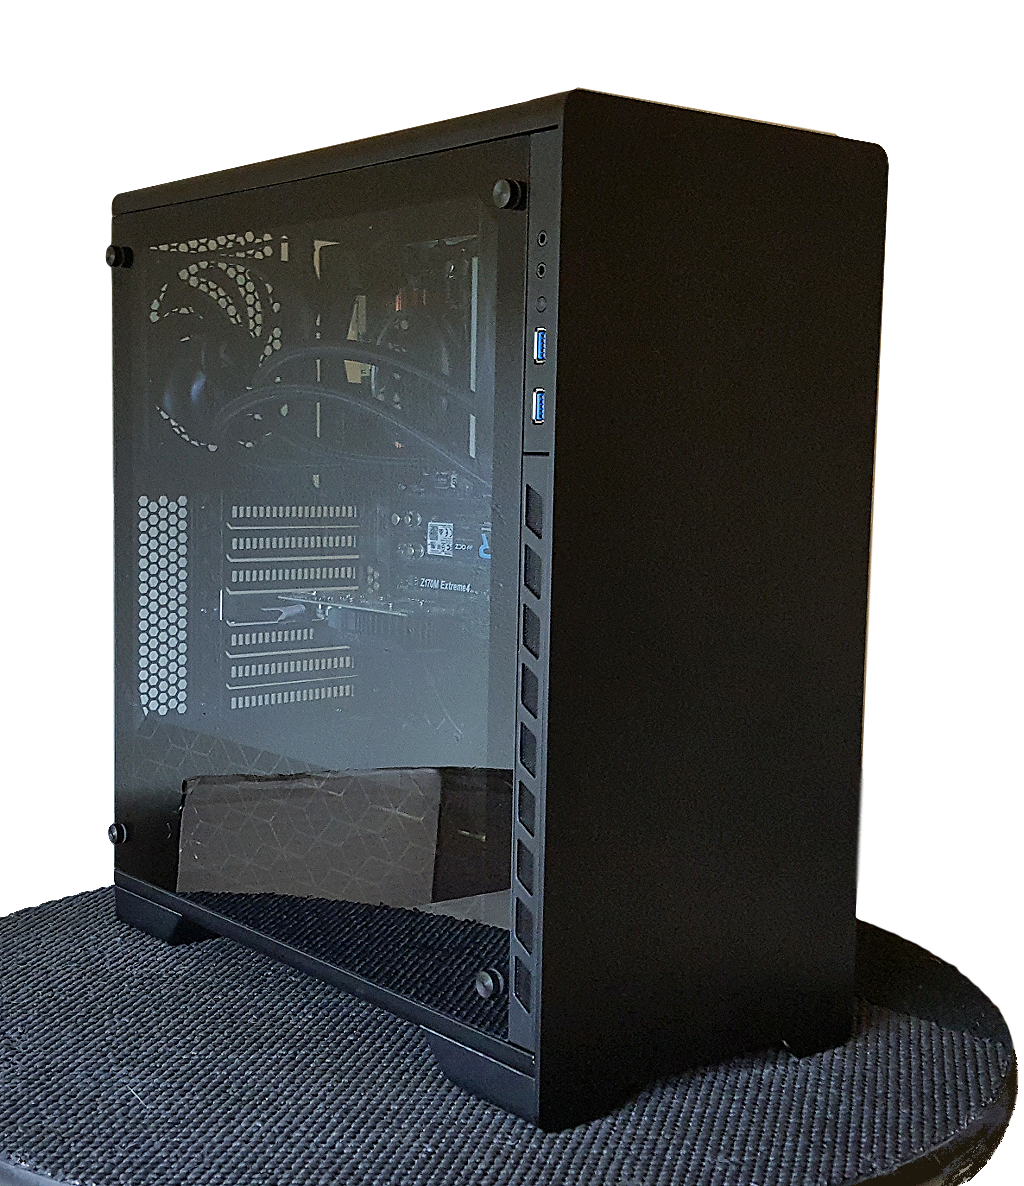
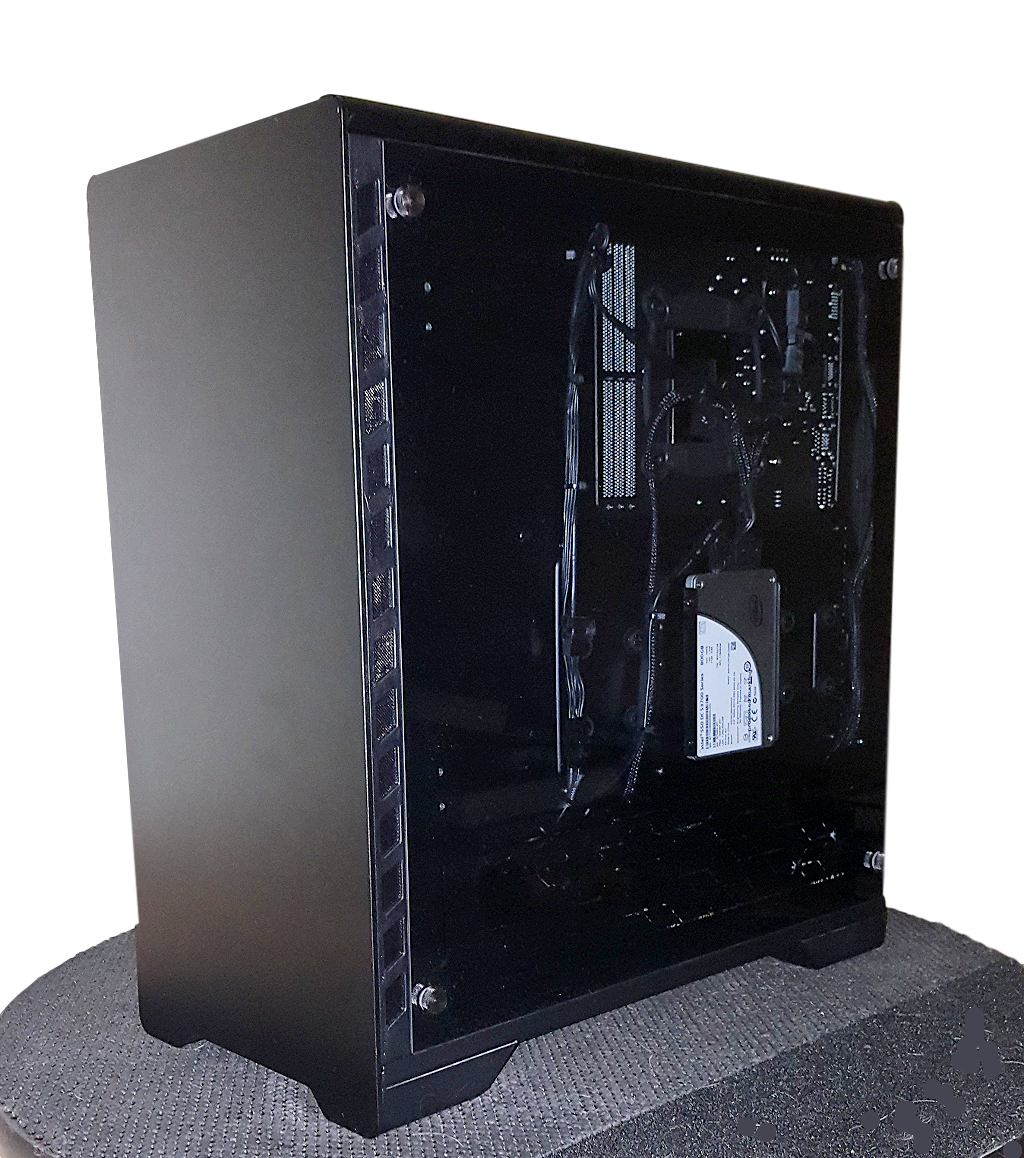
 Now then, lets peel the static cling sheets off of the tempered glass panels and install them. Below is a look at the right side with the tempered glass panel now installed. the slightly darkened tempered glass panel achieves a nice see-through effect that is more discrete than garish.
Now we get to see the finished build from the left side with the tempered glass side panel now in place. Again, a very nice balance between see-through and discrete is achieved. Illuminated components such as the Kraken’s RGB lighting and the LED strips are readily visible without requiring eye protection to observe them.